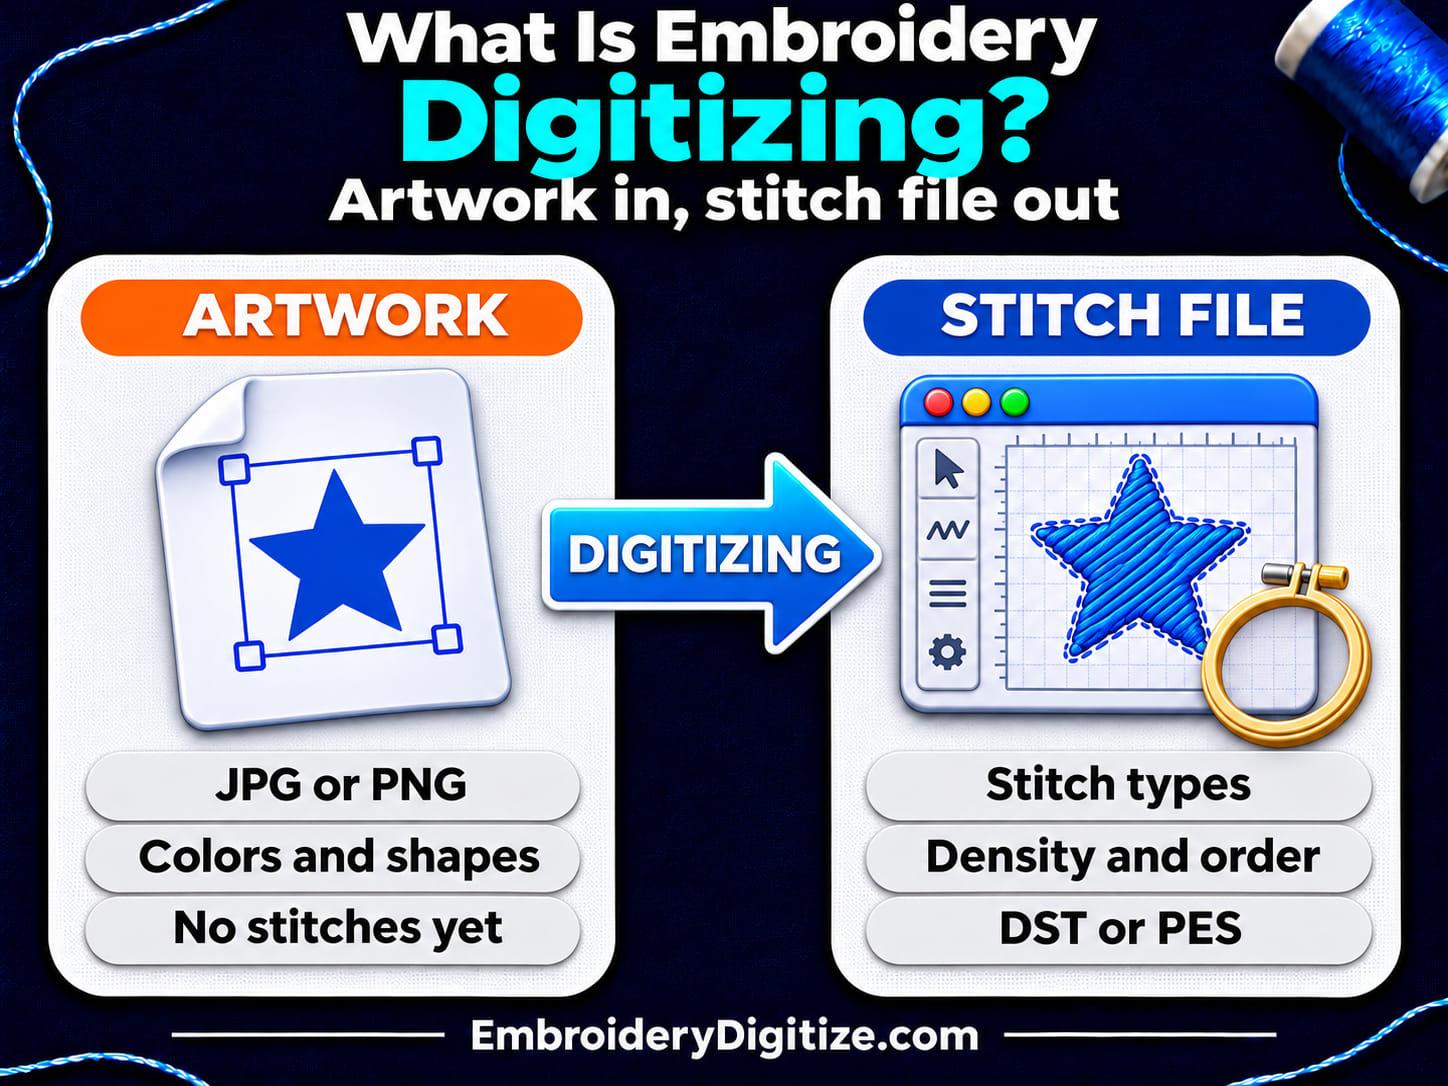
Quick answer: Embroidery digitizing is the process of converting artwork into a stitch file that an embroidery machine can sew. A digitizer uses software to choose the stitch types, density, direction and sewing order, then saves a machine file such as DST or PES. A JPG or PNG cannot be sewn directly because it holds no stitch instructions.
If a shop has ever asked you for a "stitch file," you have met digitizing. A JPG or PNG shows what a design looks like. A stitch file tells the machine what to do, one stitch at a time. This guide explains what embroidery digitizing is, what a digitized file holds, how a design is digitized step by step, which settings decide how well it sews, and how digitizing differs from converting, tracing and auto-digitizing.
The facts come from software documentation and glossaries (Wilcom EmbroideryStudio and Ink/Stitch), from EduTech Wiki, a university wiki whose pages we cite are marked as drafts, and from the artwork guidelines that Printful and Stadium publish for their own embroidery orders. EmbroideryDigitize sells digitizing services, and the last section describes ours. The explanations here come from the sources named above, we linked every one, and we did not stitch a test design for this guide.
What Is Embroidery Digitizing?
Digitizing is the step between your artwork and the machine. Wilcom's EmbroideryStudio glossary calls it the "Process of encoding a design" and says "Artwork is converted into a series of 'embroidery objects' to be read and manipulated by a specialist CAD/CAM application." Before the design goes to an embroidery machine, the glossary adds, it is converted into stitch data. Stadium's embroidery guidelines put it more plainly: "Digitizing is the process of converting your logo or artwork into a stitch file that embroidery machines can read."
Two more words you may meet:
- Digitizer. Wilcom's glossary says the word usually refers to "the person punching or digitizing the design."
- Punching. The glossary says this older term refers to an earlier method of machine embroidery in which designs were "punched" to paper tape. Both words describe turning artwork into commands that a machine reads.
If the idea is new to you, our short answer to why you need embroidery digitizing is a good place to start. This guide goes further into how the work is done.
Why Can't an Embroidery Machine Sew a JPG or PNG?
A JPG or PNG stores pixels and colors. A vector file such as SVG or AI stores shapes and colors. Neither one says where the needle should go. A machine needs stitch positions plus commands such as jumps, trims and thread changes. Printful's help page says digitization "turns a standard image file, such as PNG or JPEG, into a stitch file" that includes stitch types and stitch density, thread paths, and thread color mapping based on the available embroidery thread colors.
That is why a normal file conversion cannot do the job. Our guide to converting an image to an embroidery file explains why a JPG or PNG cannot simply be converted to PES or DST.
What Does a Digitized File Contain?
An embroidery job can involve three kinds of file. The machine itself reads the machine file.
| File type | What it holds | Can a machine sew it? |
|---|---|---|
| Artwork (JPG, PNG, PDF, SVG, AI) | Pixels, or vector shapes, and colors. No stitches. | No. It has to be digitized first. |
| Design file (editable) | Wilcom's help says design files "usually contain digitized shapes and lines, selected stitch types and stitch values and effects." Its glossary names EMB, JAN and ART as native design formats. | It is used for editing in software, then saved as a machine file. |
| Machine file (also called a stitch file) | Wilcom's glossary says machine files "contain only stitch coordinates and machine functions." Common examples are DST, PES, JEF, EXP and VP3. | Yes, if the machine reads that format. Wilcom's help says machine files are "only suited to specific embroidery machines." |
"Machine functions" include commands such as jumps and trims. Wilcom's glossary says jump functions cause "frame movements without needle penetrations," and that a trim code causes the thread to be cut after a tie-off on machines with an automatic trimmer. Ink/Stitch's workflow guide adds that when the color changes from one object to the next, the exported file gets a thread change command.
Our embroidery file formats guide lists the common machine formats by brand, and our guides to DST files and PES files cover the two you will meet most.
How Is a Design Digitized, Step by Step?
Every digitizer has their own software and habits, but the work follows the same pattern. This outline combines EduTech Wiki's overview of the embroidery workflow, Wilcom's help and Ink/Stitch's workflow guide.
- Prepare the artwork. EduTech Wiki's workflow includes adapting the drawing to the limits of embroidery: "eliminate the fine details, reduce the colors." Wilcom's help says vector graphics "preserve the picture quality when resized," while bitmap images cause "pixelation and image degradation when enlarged or scaled down." Ink/Stitch's guide says the design needs to be in vector format (SVG).
- Set the finished size and note the fabric and machine. Stadium says "Each embroidery type and size requires a separate digitized file." Wilcom's Stitch Quality page says its Auto Fabric settings let the software "take into account the type of fabric you are stitching on."
- Build embroidery objects. Wilcom says you "build designs from basic shapes or 'embroidery objects'" that have properties such as color, size and position, plus properties unique to embroidery "such as stitch type and density."
- Choose a stitch type for each object. Run stitches follow lines, satin stitches cover narrow shapes and fills cover large areas (see the table below). For example (our illustration, not a test), a logo with thin lettering on a large filled circle might use satin stitches for the lettering and fill stitches for the circle.
- Set direction, density, underlay and pull compensation. Ink/Stitch's guide says its Params dialog "controls how Ink/Stitch generates stitches for the selected objects," and that parameters include stitch length, density, underlay, direction and pull compensation.
- Plan the stitch order, colors and travel. Ink/Stitch says "A well planned path reduces visible jump stitches and limits color changes." Wilcom's Stitch Quality page covers adding connectors, tie-offs and trims.
- Preview, then save the machine file. Ink/Stitch lists a simulator, a print preview and a stitch plan preview, then says to "export the design to a machine compatible format." It also says to save the design as an SVG so you can reopen it later and change settings, stitch order or details.
- Sew a test and adjust. Ink/Stitch says to "Prepare a test fabric that closely matches the final material," with the same stabilizer and fabric type, and to look for gaps and for places where stitches are packed too tightly. It adds that it "often takes several iterations to achieve the desired result."
Software can automate parts of these steps. How much you still have to do by hand depends on the artwork and the tool, as explained in the comparison further down.
What Are the Main Stitch Types in Digitizing?
Wilcom's glossary says "Three basic stitch types are available with lockstitch machines": run, satin and tatami (also called weave), and that its software offers many variants of them.
| Stitch type | How it is built | What it is generally used for |
|---|---|---|
| Run stitch | Wilcom says it "places a single row of stitches along a digitized line." It is also called a walk stitch. | Outlines and connector stitches. |
| Satin stitch | "Formed by closely arranged zigzag stitches," per Wilcom's glossary. | Lettering, outlining and details. Wilcom says it is "only suitable for small or narrow shapes" and gives a glossy effect. |
| Tatami (fill) stitch | Wilcom describes a "Series of run stitches" laid in rows back and forth across a shape. | Large, irregular shapes. |
EduTech Wiki counts five main families by adding manual stitches and programmable or specialty stitches to the three above. Our guide to satin stitch vs fill stitch explains how digitizers combine them in one design.
What Decides Whether a Digitized Design Sews Well?
Wilcom's Stitch Quality page says that to sew out correctly, an object must have "correct stitch spacing, sufficient pull compensation together with a suitable underlay for the combination of cover stitch type, object type, object shape and fabric." In plain words: density is how closely the stitches sit, underlay supports the top stitching, and pull compensation offsets the way thread pulls the fabric. The right settings depend on the fabric and the design. Here is each one in turn:
| Setting | What it means | What it helps with |
|---|---|---|
| Stitch density | Wilcom's glossary: "The number of stitches per given area (or stitch lines per distance in a fill)." | Coverage. Ink/Stitch says areas where stitches are "packed too tightly" make the machine struggle and usually signal that density is set too high. |
| Underlay | Stitches sewn before the other elements. Wilcom says underlay helps "stabilize fabrics and reduce puckering and pulling especially on larger designs." | Wilcom says it also provides "loft," raising cover stitches and preventing them from sinking into soft fabrics. See our underlay guide. |
| Pull compensation | Wilcom's help says "Embroidery stitches tend to pull fabric inwards where the needle penetrates." Automatic pull compensation counters this by overstitching the outlines of filled shapes on the sides where the needle penetrates. | Gaps and shape distortion. EduTech Wiki shows how a circle can become an oval, and Wilcom's help adds that underlay, appropriate backing and topping "can also reduce the push-pull effect." See our pull compensation guide. |
| Stitch order and travel | The sequence in which objects sew, and how the needle moves between them. | Ink/Stitch says each stitch pulls and shifts the material slightly, which can distort the design as it builds, and that a planned order reduces visible jump stitches and color changes. |
| Size, placement and fabric | Stadium says embroidery results "vary significantly depending on placement, garment type, size, color, and design thickness." | A design that works on a hoodie may not work on a hat or polo, per Stadium. See our hat embroidery guide and sizing and placement guide. |
Digitizing is only part of the result. EduTech Wiki, quoting digitizer Kathy Jones, names puckering, poor fabric coverage and poor registration as the "big three" problems of embroidery, and says "Correct stabilization, correct hooping and correct tension on your embroidery machine" help a great deal. Wilcom's glossary adds that the more stitches a design has, the heavier the backing required, and that professional embroiderers use "tear-away stabilizers for woven fabrics and cut-away stabilizers for knits." These are Wilcom's general statements, not fixed rules: the right backing also depends on the fabric and the design, so ask your embroiderer. Our guide to stitch count explains why more stitches also tend to cost more.
How Is Digitizing Different from Converting, Tracing and Auto-Digitizing?
These four words are often mixed up. They are different jobs with different results.
| Term | What it does | What you end up with |
|---|---|---|
| Digitizing | Builds the stitches (types, density, order) from artwork. | A machine file, and often an editable design file. |
| Auto-digitizing | Software analyzes the artwork and generates the stitches automatically. Wilcom's help says "The quality of auto-digitized designs greatly depends on the type and quality of the original artwork." EduTech Wiki says even smart software may need you to "intervene manually." | A stitch file that may still need manual changes or settings. See auto vs manual digitizing. |
| File conversion | Changes the format of a stitch file that already exists, such as DST to PES. Our free embroidery format converter page says it "converts files that are already digitized." | The same stitches in another machine format. Formats store different information: our file viewer page says some formats, such as DST and EXP, do not store thread colors. Check the converted file's size, colors and stitch order before you sew it. |
| Vector tracing | Redraws a logo or image as clean shapes. Our vector tracing page says we "redraw your logo or image as a clean, scalable vector file." | A vector file such as SVG or AI. It is still artwork, not a stitch file. |
Who Can Digitize a Design?
There are four common routes. None is best for everyone.
| Route | Good for | Watch for |
|---|---|---|
| You, in embroidery software | People who already embroider and want full control. | Learning time. Wilcom's help says new digitizers may be tempted to raise stitch density, but "it is much more effective to apply an automatic underlay." See our guides to digitizing a logo and free embroidery digitizing software. |
| An auto-digitizing tool | Simple, bold artwork and quick tests. | Results depend on the artwork and may need manual changes. |
| Your embroiderer or a print-on-demand provider | Convenience, since digitizing is part of the order. | Providers set their own rules and fees. Printful says "Every new embroidery design must be digitized before it can be embroidered," and that a design uploaded again as a new file is treated as a new design. Ask whether you receive the file itself. |
| A digitizing service (including ours) | A file prepared for your machine's format. | Check the formats, the revision policy and whether you also get an editable design file. Our digitizing page says our team digitizes every design by hand, "choosing stitch types, direction and density," and lists DST, PES, EXP, JEF, VP3, XXX, HUS, PXF and EMB among the formats it delivers. |
Our guide to in-house vs outsourced digitizing compares the two main approaches for a business, and our guide to embroidery digitizing services explains what to expect when you order.
Can I Resize or Edit a Digitized File?
It depends on which kind of file you have. Wilcom's glossary says "Machine files are generally not suited to scaling because stitches are not regenerated during rescaling." Design files are different: "Design files can be scaled, transformed and reshaped without affecting stitch density or quality," per the same glossary. That describes the software regenerating the stitches. It is not a promise that every detail will still look right at a new size, so check a sample.
Printful's help page says resizing, repositioning and rotating are changes that may require digitization again, and Stadium says each embroidery type and size requires its own digitized file. In practice, keep the editable design file if your digitizer gives you one, and ask for a new or adjusted file when the size, placement or garment changes.
What Should I Send a Digitizer?
- The cleanest artwork you have. A vector file is best, since Wilcom says vector graphics preserve picture quality when resized.
- The finished width and height, in inches or millimeters, and where the design goes.
- The garment and fabric, if you know them.
- Your machine model or the file format you need. If you do not know the format, give the machine model. Our digitizing page says to tell us your machine model if you are not sure.
- Your brand colors. Thread ranges differ by provider. Printful's help page describes a fixed set of thread colors for its embroidery and says some colors in the final product may look slightly different from the original design. Stadium says it matches a design to "the closest available thread." Ask your digitizer which threads it uses.
Our logo digitizing guide for small businesses goes through these decisions in detail and explains how to check a digitized logo before you approve it.
What Affects the Cost of Digitizing?
It depends on the provider and on the work needed to prepare the design. Size, detail, stitch count and revisions are common factors, and stitch count may affect the price depending on the provider's pricing model. This guide gives no prices or turnaround times. Our cost guide covers the factors in more detail, and our stitch count and price estimator page says its AI estimates the stitch count from your artwork and finished size. Treat any estimate as an estimate, not a stitched result.
What Do Common Digitizing Terms Mean?
| Term | Plain meaning |
|---|---|
| Stitch count | The total number of stitches in a design. Density is different: it describes how closely the stitches sit. |
| Stitch density | How many stitches sit in a given area, or how many stitch lines sit side by side in a fill. |
| Underlay | Foundation stitches sewn first. EduTech Wiki describes them as sparse stitches that "will be covered by dense stitches and thus invisible in the final embroidered work." |
| Pull compensation | A software setting that offsets the way thread pulls fabric inward, so shapes sew out at the intended size. |
| Jump | A move of the hoop frame without stitching, used to get from one part of the design to another. |
| Trim | A command that cuts the thread, on machines that have an automatic trimmer. |
| Tie-in and tie-off | Small securing stitches. Wilcom says tie-offs are generally placed before trims "to prevent stitches from unraveling." |
| Backing (stabilizer) | Wilcom's glossary describes it as "woven or non-woven materials placed beneath the item or fabric being embroidered for stability and support." |
| Machine file | A stitch file in a format an embroidery machine reads, such as DST or PES. |
| Design file | An editable file made in digitizing software that keeps shapes, stitch types and settings. |
Frequently Asked Questions
What is embroidery digitizing?
It is the process of converting artwork into a stitch file that an embroidery machine can read. The file holds stitch positions and machine commands, such as thread changes, instead of a picture.
What does it mean to digitize a design?
It means building the stitches for a design: choosing the stitch types, setting density and underlay, putting the objects in sewing order and saving a machine file. The same word is used for the person who does this, a digitizer.
Is digitizing the same as punching?
The two words describe the same idea. Wilcom's glossary says "punching" is the older term, from an earlier method in which designs were punched to paper tape, and defines it as converting artwork into commands that an embroidery machine's controller reads.
Why can't my embroidery machine sew a JPG or PNG?
Those files hold pixels and colors, not stitch instructions. A machine needs needle positions and commands, which digitizing creates. Renaming or converting the image does not add them.
Is digitizing the same as converting a file?
No. Converting changes the format of a stitch file that already exists, such as DST to PES. Digitizing creates the stitches from artwork in the first place. Our free converter page says it converts files that are already digitized.
Can software digitize automatically?
To a point. Wilcom's help says "The quality of auto-digitized designs greatly depends on the type and quality of the original artwork," and EduTech Wiki says you may have to "intervene manually" to get a decent result. Our guide to auto vs manual digitizing covers the trade-offs.
What file format does a digitized design come in?
A machine file in the format your machine reads, such as DST, PES, JEF, EXP or VP3. Our file formats guide lists them by machine brand. Digitizing services differ in which formats they deliver, so ask for yours.
Can I digitize a photo?
Photos are hard to digitize well. Wilcom's help says "Embroidery digitizing works least effectively with photographic images," but that you can pick out the shapes you want to embroider and leave out unnecessary detail. Its software also has photo features (Photo Flash and Color PhotoStitch), whose results it compares to the output of a line printer and to multi-colored stippling. Stadium says "Embroidery cannot replicate photographic images directly," that photos must first be simplified into solid shapes and distinct color blocks, and that "Complex photo details may be lost during the embroidery process."
Do I need digitizing for hand embroidery?
No. Digitizing creates files for embroidery machines. Hand embroidery does not use a stitch file.
I already have a PES or DST file. Do I still need digitizing?
Usually not. A PES or DST file already holds stitch instructions, so you may only need a format your machine reads. Converting does not change the stitches, though, so a design digitized for another size or fabric may still need adjusting. If you only have artwork, it needs digitizing first.
Can I resize a digitized design?
Be careful. Wilcom's glossary says machine files are generally not suited to scaling because stitches are not regenerated when they are rescaled. Printful says resizing may require digitization again. Ask your digitizer for the size you need.
Why does the same logo need different files for a cap and a shirt?
Stadium says a design that works well on a hoodie may not translate effectively onto a hat or polo, and that each embroidery type and size requires a separate digitized file. See our hat embroidery digitizing guide.
How do I know whether a digitized file is good?
First inspect it on screen at its real size: check the dimensions, the sewing order, jumps and trims, the colors and the format, and read the smallest text. Our embroidery file viewer page says it shows a design's width, height, stitch count, thread colors, jumps and trims, and plays back the stitch order. Then stitch a sample on your fabric with the same stabilizer, because a screen preview cannot show how thread and fabric behave together. Ink/Stitch's guide says it often takes several iterations to get the result you want.
Final Thoughts
Embroidery digitizing translates artwork into stitch instructions a machine can read. How well that works depends on the stitch types, direction, density, underlay, pull compensation and order chosen for your size, fabric and machine. A clean source file and a few facts about the job make it easier for whoever does the work.
Start with clean artwork, tell your digitizer the size, fabric and machine, and check a sample before you commit to a run. Keep the approved machine file, and the editable design file if you have one, so the next order starts from something that already works.
Sources and Further Reading
Facts about digitizing come from the pages below, which we opened on November 17 and 18, 2026. This guide is a documentation-based explainer, not a report of independent stitch testing. The Wilcom links are to specific software versions, so menus and settings can differ in your version. Printful's and Stadium's numbers and rules apply to their own orders. Wilcom, Ink/Stitch, EduTech Wiki, Printful and Stadium are names of their respective owners. EmbroideryDigitize is not affiliated with them, and the names appear only to show where each fact comes from.
- Glossary (Wilcom EmbroideryStudio 28 help), Embroidery Digitizing, Embroidery file formats and Stitch Quality (EmbroideryStudio 26 help).
- Stabilizing with underlays, Pull compensation, Auto-digitizing artwork, Digitizing with Bitmaps and Choosing suitable artwork (EmbroideryStudio 27 help).
- Workflow (Ink/Stitch documentation).
- Concepts of computerized embroidery and Embroidery stitch type (EduTech Wiki, University of Geneva; both pages are marked as drafts).
- What is embroidery digitization? (Printful Help Center) and Embroidery Guidelines (Stadium Help Center).
- Related on embroiderydigitize.com: our embroidery digitizing page, vector tracing page, format converter, file viewer, estimator, and the guide to embroidery patch digitizing.
Need a Logo or Image Digitized?
Turn your logo, artwork, or custom design into a production-ready embroidery file.
Create your free EmbroideryDigitize account and submit your artwork, required size, garment type, and preferred embroidery format, such as PES or DST.
Existing customer? Login here.
If you already have an embroidery file but need another machine format, use our Free Embroidery Format Converter to convert supported embroidery files online.