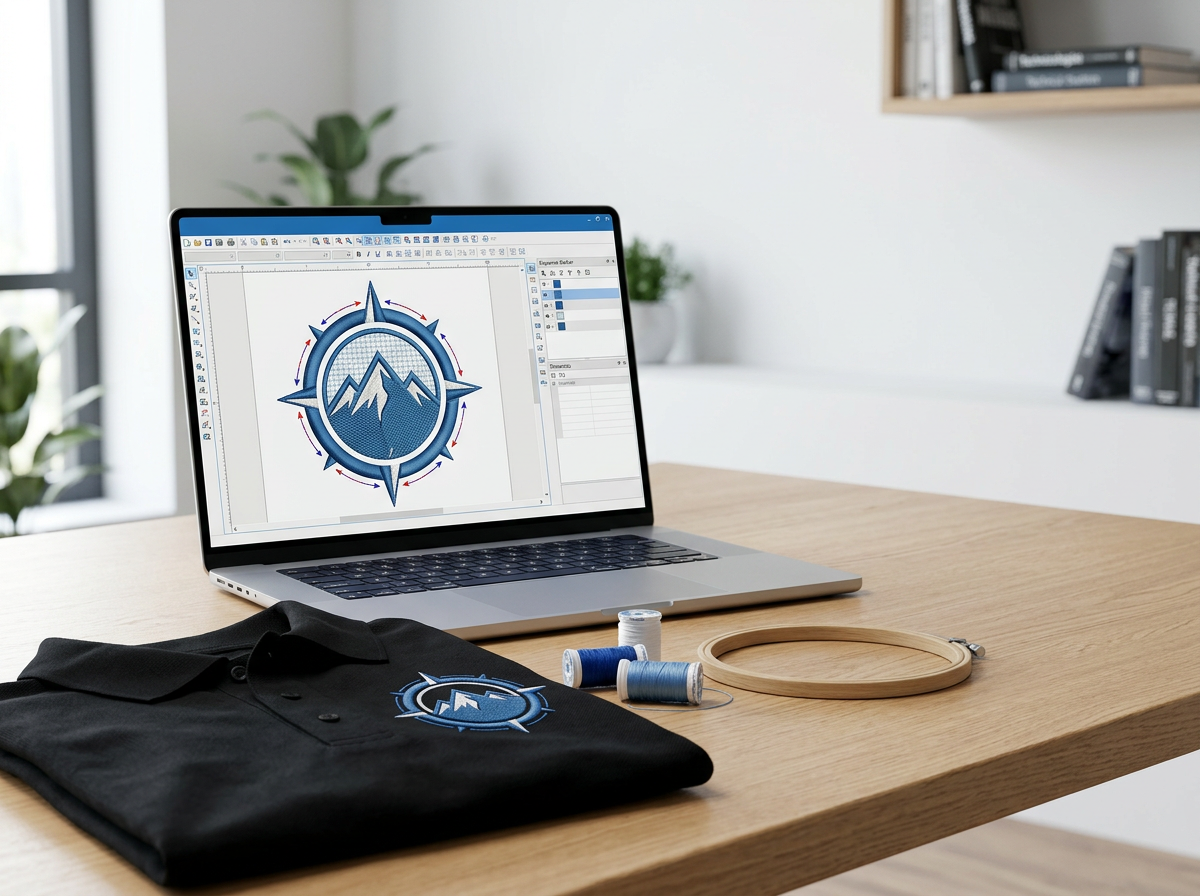
Quick answer: To digitize a logo for embroidery, you must convert the artwork into a machine-readable stitch file and then plan the stitch types, stitch direction, density, underlay, sequencing, and pull compensation for the intended fabric and finished size. The design should be tested on fabric before production and exported in the format required by the embroidery machine.
If you have a logo in JPG, PNG, PDF, AI, or SVG format, you cannot simply send that image directly to an embroidery machine. Embroidery machines need stitch instructions that tell the machine where to sew, how the stitches should be constructed, when to stop, and when to change thread colors.
This guide explains how to digitize a logo for embroidery from start to finish, including artwork preparation, stitch selection, underlay, density, stitch sequencing, compensation, testing, and file export.
What Does It Mean to Digitize a Logo for Embroidery?
Embroidery digitizing is the process of converting artwork into a structured set of stitches that an embroidery machine can read and sew.
A normal image contains pixels, colors, shapes, and lines. An embroidery machine needs something different: a stitch plan.
The digitizer decides:
- Which areas should use satin stitches
- Which areas should use fill stitches
- Where running stitches are appropriate
- Which direction each group of stitches should follow
- How dense the stitches should be
- Which underlay should support the design
- How much pull compensation is required
- Which object should stitch first
- Where thread changes should occur
- How trims and jumps should be handled
- What final size the design should be stitched at
This is why embroidery digitizing is more than converting an image into DST or PES. The file extension is only one part of the final production file. The actual quality comes from how the stitch plan is constructed.
If you want to understand the broader process first, read our complete guide to embroidery digitizing services.
Can You Digitize a Logo Yourself?
Yes. You can digitize a logo yourself if you have suitable embroidery digitizing software and understand how embroidery stitches behave on fabric.
Free and professional software can provide tools for creating embroidery designs, but learning the technical side of digitizing takes practice. A beginner needs to understand stitch types, density, underlay, stitch direction, sequencing, compensation, and how different fabrics affect the final result.
For a simple logo with large shapes, solid colors, and readable lettering, learning the basics may be enough to create a workable design. Complex logos, small lettering, detailed artwork, and production designs often require more advanced digitizing skills.
What Do You Need to Digitize a Logo?
Before starting, gather the following information and tools:
- Original logo artwork: Preferably a clean vector or high-resolution image.
- Embroidery digitizing software: Use software that allows you to create and edit stitch objects.
- Finished design size: Know the width and height you need.
- Fabric information: A cap, polo, jacket, towel, and stretchy garment can require different settings.
- Thread colors: Identify the colors you want to reproduce.
- Machine format: Determine whether your machine requires DST, PES, JEF, VP3, EXP, or another format.
- Test fabric: Ideally use the same or similar material that will be used for production.
Your finished size is particularly important. A logo digitized for a large jacket back should not simply be reduced to create a small left-chest logo. Smaller embroidery may require different stitch construction and simplified details.
Our embroidery sizing and placement guide provides additional information about choosing appropriate embroidery dimensions and placement.
How to Digitize a Logo for Embroidery: Step-by-Step
The following workflow provides a practical overview of how a logo can be converted from artwork into a production-ready embroidery design.
Step 1: Start With High-Quality Artwork
Begin with the cleanest version of the logo you have.
Vector artwork such as SVG, AI, or EPS can be especially useful because the shapes can be scaled without losing their original line quality. High-resolution PNG or JPG artwork can also be used as a reference.
A clean source image makes it easier to identify:
- Individual shapes
- Outlines
- Text
- Color areas
- Overlapping objects
- Small details
Do not worry if your artwork is not already embroidery-ready. Artwork preparation and embroidery digitizing are separate but related steps.
For more information, read our guide to preparing artwork for embroidery.
Step 2: Decide the Final Embroidery Size
Determine exactly how large the logo needs to be when embroidered.
For example, a logo may be used as:
- A small left-chest design
- A large front design
- A jacket-back logo
- A sleeve logo
- A cap logo
- A bag or accessory design
The same artwork may require different digitizing decisions at different sizes.
Small lettering and thin lines are particularly affected when a design is reduced. If the final size is known before digitizing begins, the design can be built specifically for that size instead of being resized afterward.
Step 3: Simplify the Artwork Where Necessary
Embroidery cannot reproduce every detail that can appear in a digital image.
Gradients, photographic details, extremely thin lines, tiny gaps, miniature lettering, and intricate textures may need to be simplified.
The goal is not to remove important parts of the logo. The goal is to preserve the elements that make the logo recognizable while adapting them to thread.
For example, a thin line that is clearly visible on a computer screen may become too narrow to stitch reliably. Similarly, two tiny objects separated by a very small gap may merge after embroidery.
When preparing artwork for embroidery, it is useful to think about the physical size of thread and stitches, not just the appearance of the artwork on screen.
Step 4: Separate the Logo Into Objects
Instead of treating the logo as one flat image, divide it into logical embroidery objects.
For example, a simple company logo might contain:
- A background shape
- A large colored fill
- A logo symbol
- An outline
- Company lettering
Each object can then be assigned the stitch structure that makes the most sense for its shape and size.
Step 5: Choose the Correct Stitch Type
Three common stitch structures are running stitch, satin stitch, and fill stitch.
Running Stitch
Running stitches are useful for fine lines, outlines, and certain narrow details.
Satin Stitch
Satin stitches are commonly used for lettering, borders, narrow columns, and other areas where a smooth, dense stitched surface is appropriate.
Fill Stitch
Fill stitches are generally used for larger areas that need broad thread coverage.
The correct stitch type depends on the shape, width, size, fabric, and desired appearance. A professional design may use all three stitch structures in the same logo.
Step 6: Set Stitch Direction
Stitch direction affects both the appearance and behavior of embroidery.
Changing stitch angles between objects can help distinguish different areas of the design and can also influence how light reflects from the thread.
For example, a large fill area may be stitched at one angle while an adjacent object uses a different angle. This can create visual separation without requiring another color.
Stitch direction also needs to be considered in relation to the shape and fabric because thread movement can influence the final result.
Step 7: Add Underlay
Underlay is a foundation layer of stitches placed beneath the visible top stitching.
It can help stabilize the fabric, support top stitches, improve coverage, and create a more controlled surface for the visible embroidery.
Common underlay approaches include:
- Edge-run underlay
- Center-run underlay
- Zigzag underlay
- Other foundation structures for larger fill areas
Underlay should not simply be applied at the same setting to every object. The appropriate foundation depends on the stitch type, object size, fabric, and design requirements.
Too little support can allow the fabric to move excessively, while unnecessary additional stitching can increase bulk.
Step 8: Adjust Stitch Density
Stitch density refers to how closely stitches are placed within an embroidery area.
Density needs to provide adequate coverage without creating unnecessary thread buildup.
Too little density can result in:
- Visible gaps
- Uneven coverage
- Fabric showing through
- Weak-looking areas
Too much density can contribute to:
- Excessive thread buildup
- Stiff embroidery
- Thread breaks
- Needle stress
- Longer production times
There is no single density setting that works perfectly for every logo. Fabric, stitch type, design size, thread, and backing all influence the appropriate settings.
Step 9: Apply Pull Compensation
Embroidery thread can cause fabric and stitched objects to move as the design is sewn. This means the final embroidered shape may not exactly match the shape displayed on the computer screen.
Pull compensation is one of the techniques digitizers use to account for this effect, particularly in narrow satin columns, lettering, and other areas where thread tension can make an object finish narrower than intended.
Compensation should be adjusted according to the object, fabric, stitch structure, and density rather than applying one universal value to every design.
Step 10: Plan the Stitch Sequence
The order in which objects are embroidered is called the stitch sequence.
A well-planned sequence can help:
- Maintain registration between objects
- Reduce unnecessary jumps
- Reduce unnecessary trims
- Control overlapping elements
- Keep the design efficient to sew
- Improve the final appearance
In many designs, larger or background areas are stitched before smaller foreground details. However, the correct sequence depends on the actual design structure.
Step 11: Add Thread Color Changes
If the logo contains multiple colors, plan the thread changes as part of the stitch sequence.
Unnecessary color changes can increase production time, so the design should be organized efficiently while still maintaining the intended appearance.
Remember that an embroidery file contains machine instructions, while the actual thread colors may be selected by the operator based on the thread brand and production setup.
Step 12: Check Jumps, Trims, and Travel Stitches
Review the path between embroidery objects.
Unnecessary jumps and trims can make a design slower and less efficient to sew. At the same time, eliminating a necessary trim simply to reduce machine movements can create unwanted connecting stitches.
The objective is not to achieve the fewest possible trims at any cost. The objective is to create a clean, logical, production-friendly stitch path.
Step 13: Preview the Design
Before exporting the file, inspect the design in your embroidery software.
Look for:
- Incorrect object order
- Unexpected overlaps
- Very short stitches
- Excessive density
- Unnecessary jumps
- Incorrect color changes
- Small details that may not stitch clearly
- Incorrect dimensions
A software simulation is useful, but it cannot completely replace a physical test stitch.
Step 14: Test Stitch the Logo
A test sew-out is one of the most important steps in professional embroidery digitizing.
Whenever possible, test the design on the same or similar fabric, stabilizer, thread, and machine conditions that will be used in production.
A test stitch can reveal problems such as:
- Puckering
- Gaps
- Thread breaks
- Poor registration
- Unreadable lettering
- Excessive density
- Incorrect stitch direction
- Unwanted thread buildup
After testing, the digitizer can make adjustments and test again if necessary.
Step 15: Export the Correct Embroidery File Format
Once the design has been tested and finalized, export it in the format required by the embroidery machine.
Common embroidery formats include:
| Format | Common Association |
|---|---|
| DST | Tajima and widely supported commercial embroidery machines |
| PES | Brother and related systems |
| JEF | Janome |
| EXP | Melco and some related systems |
| VP3 | Husqvarna Viking / Pfaff systems |
| HUS | Older Husqvarna Viking systems |
The exact format you need depends on your embroidery machine.
If you're unfamiliar with DST, see our complete DST embroidery file guide.
For a comparison of the most common formats, read PES vs. DST vs. JEF: Which Embroidery File Format Do You Need?.
What Is the Best Software for Embroidery Digitizing?
There is no single embroidery digitizing program that is best for every user. The right software depends on your experience, budget, machine requirements, and the type of designs you want to create.
Software used for embroidery digitizing generally provides tools for:
- Creating stitch objects
- Editing stitch paths
- Assigning stitch types
- Changing stitch direction
- Adjusting density
- Adding underlay
- Applying compensation
- Managing thread colors
- Editing stitch sequences
- Previewing designs
- Exporting machine formats
Beginners may start with more accessible tools, while professional digitizers often use advanced software with detailed manual controls.
The important factor is not simply which software you use. It is whether you understand how to build a stitch file that works on the actual fabric and machine.
Can AI Automatically Digitize a Logo?
AI and automatic digitizing tools can help convert artwork into an initial embroidery design, but automatic conversion should not be confused with a production-tested professional digitized file.
Automatic tools can be useful for simple designs and experimentation. However, a machine-ready design may still require manual adjustments to stitch types, density, underlay, sequencing, compensation, lettering, and small details.
The final result should be judged by how the design sews on fabric, not only by how the digital preview looks.
What Makes a Good Embroidery Digitized Logo?
A good digitized logo should be designed around the actual production requirements rather than simply matching the appearance of the original image.
Important characteristics include:
- Clean stitch paths
- Appropriate stitch types
- Balanced density
- Suitable underlay
- Correct compensation
- Logical sequencing
- Readable lettering
- Appropriate design size
- Efficient color changes
- Minimal unnecessary jumps and trims
- Good registration between objects
- Reliable performance during sewing
In other words, a good digitized design should not only look right on screen; it should also sew correctly on fabric.
How Does Design Size Affect Logo Digitizing?
Design size has a major effect on how artwork should be digitized.
A large logo can accommodate details that would be impossible in a small logo. When the same artwork is reduced, thin lines can disappear, lettering can become unreadable, and small gaps can close.
This is why professional digitizing is often performed for a specific finished size rather than creating one file and resizing it indefinitely.
For detailed sizing recommendations, see our embroidery sizing and placement chart.
How to Digitize a Logo for a Hat
Hat embroidery has additional challenges because the front panel is curved and can behave differently from a flat garment.
When digitizing a logo for a cap, consider:
- Final logo width and height
- Cap panel shape
- Stitch direction
- Center placement
- Letter size
- Underlay
- Density
- Registration
Small text and extremely detailed artwork can be particularly challenging on caps.
For a dedicated guide, read our hat embroidery digitizing guide.
How Many Stitches Should a Logo Have?
There is no universal stitch count for a logo.
Two logos with the same physical dimensions can have very different stitch counts because of differences in shape, coverage, lettering, colors, stitch types, and density.
A higher stitch count does not automatically mean a higher-quality design. The objective is to use enough stitching to produce good coverage and structure without unnecessary thread buildup.
Read our stitch count guide to learn how stitch count can affect embroidery production and pricing.
How Much Does It Cost to Digitize a Logo?
The cost of embroidery digitizing depends on factors such as design complexity, stitch count, finished size, and the amount of technical work required.
Simple logos with large shapes may be easier to digitize than highly detailed artwork with small lettering and many objects.
At EmbroideryDigitize.com, current embroidery digitizing pricing is based on stitch count, with listed tiers beginning at $5 for designs up to 5,000 stitches. The pricing page also lists major machine formats and 24–48 hour delivery.
For the current pricing structure, visit our embroidery digitizing pricing page.
Should You Digitize a Logo Yourself or Hire a Professional?
Learning to digitize can be worthwhile if you regularly create embroidery designs and want complete control over the process.
However, professional digitizing can save time when you need a production-ready file without spending hours learning software and testing different stitch settings.
Professional help is particularly useful for:
- Complex logos
- Small lettering
- Detailed illustrations
- Caps and curved surfaces
- Stretchy or difficult fabrics
- Commercial production
- Large quantities
- Time-sensitive orders
If you're comparing the two approaches, read our guide to in-house vs. outsourced embroidery digitizing.
Why Simply Converting a JPG to DST Does Not Digitize a Logo
This is an important distinction.
A JPG contains pixels. A DST file contains embroidery stitch instructions.
Changing a file from one extension to another does not automatically create the stitch paths, density, underlay, sequencing, compensation, and other production decisions needed for quality embroidery.
File conversion and embroidery digitizing are two different processes.
If you already have an embroidery file and simply need to change its machine format, our free embroidery format converter can be used for supported file conversions.
If you have artwork and need a machine-ready embroidery file created from scratch, you need embroidery digitizing.
Common Logo Digitizing Mistakes to Avoid
1. Digitizing Without Knowing the Final Size
The design may look correct in software but fail when reduced to the actual production size.
2. Using Too Much Detail
Not every detail in a digital logo can be reproduced effectively with thread.
3. Using One Density Setting Everywhere
Different objects may require different density based on their size, stitch type, and fabric.
4. Ignoring Underlay
Underlay can provide important support beneath visible stitching. Omitting or incorrectly applying it can affect coverage, edges, and stability.
5. Skipping the Test Stitch
A design can look excellent in simulation and still require adjustments when actually sewn.
6. Resizing the Final File Without Checking It
Changing the dimensions of a completed stitch file can change stitch spacing, lettering, and overall stitch behavior. When a substantially different size is needed, a properly adjusted or re-digitized version may be preferable.
Quick Checklist: Is Your Logo Ready for Embroidery?
Before sending a logo to an embroidery machine, check the following:
- ☐ Final width and height are known
- ☐ Artwork is clear and high quality
- ☐ Small details have been reviewed
- ☐ Text is large enough to reproduce
- ☐ Stitch types are appropriate for each object
- ☐ Underlay has been planned
- ☐ Density has been reviewed
- ☐ Pull compensation has been considered
- ☐ Stitch sequence is logical
- ☐ Thread colors are assigned
- ☐ Jumps and trims have been reviewed
- ☐ Design has been tested on fabric
- ☐ Correct machine format has been exported
Frequently Asked Questions About Logo Digitizing
How do I digitize a logo for embroidery?
Prepare the artwork, determine the final size, separate the logo into objects, assign appropriate stitch types, set stitch direction and density, add underlay and compensation, arrange the stitch sequence, test the design, and export it in the embroidery machine's required format.
Can I digitize a logo from a PNG?
Yes. A PNG can be used as artwork for embroidery digitizing. However, the PNG itself is not an embroidery file. It must be converted into actual stitch instructions using embroidery digitizing software or a professional digitizing service.
Can I digitize a logo from a JPG?
Yes. A JPG can be used as a reference for digitizing, although a higher-quality source or vector artwork may make it easier to reproduce the logo accurately.
What software can I use to digitize embroidery?
Embroidery digitizing software is available in free, entry-level, and professional versions. The important capabilities include stitch creation and editing, stitch types, density, underlay, sequencing, compensation, and machine-format export.
What is the easiest embroidery file format?
There is no single format that is best for every machine. DST is widely used in commercial embroidery, while formats such as PES and JEF are associated with particular machine ecosystems. Always check your machine's required format.
Can I use an embroidery converter to digitize my logo?
No. A converter changes an existing embroidery file from one supported format to another. It does not normally create a complete stitch plan from a JPG, PNG, or other artwork.
How long does it take to digitize a logo?
Turnaround depends on the complexity of the artwork, stitch count, size, number of colors, and required revisions. Simple logos generally require less work than detailed designs.
For more information, see our guide to how long embroidery digitizing takes.
Why does my embroidered logo look different from the original artwork?
Embroidery uses thread rather than pixels or ink. Small details, thin lines, gradients, spacing, and shapes can behave differently when converted into stitches. Professional digitizing adapts the artwork to these physical limitations.
Why does my embroidery logo have gaps or puckering?
Gaps and puckering can have several causes, including density, underlay, compensation, fabric movement, stabilizer selection, hooping, thread tension, and stitch sequencing. A test sew-out helps identify which adjustments are needed.
Should I use the same digitized logo for every garment?
Not always. A logo designed for a flat polo may need different construction from one intended for a cap, jacket, towel, or stretchy garment. The finished size and fabric can affect the appropriate digitizing approach.
Professional Logo Digitizing Services
If you have a logo that needs to be converted into a professional embroidery file, EmbroideryDigitize.com provides custom embroidery digitizing for logos and artwork.
The service supports major embroidery formats and is designed around the intended machine, fabric, hoop size, and finished design requirements. The current website lists DST, PES, EMB, JEF, and other major formats, along with revisions and 24–48 hour delivery.
Instead of simply converting an image, professional digitizing creates a stitch plan designed for actual embroidery production.
Have a logo ready? Visit the EmbroideryDigitize pricing page to review current options and start your order.
Final Thoughts
Learning how to digitize a logo for embroidery starts with understanding that embroidery is a physical stitching process, not simply a digital image conversion.
A successful embroidery design requires the artwork to be adapted to its final size and fabric, then converted into carefully planned stitch objects. Stitch type, direction, density, underlay, compensation, sequencing, thread changes, and testing all contribute to the final result.
If you're learning embroidery digitizing, start with simple logos and practice one technique at a time. If you need a production-ready design without spending time learning and testing digitizing software, professional embroidery digitizing can provide a faster route from artwork to machine-ready file.