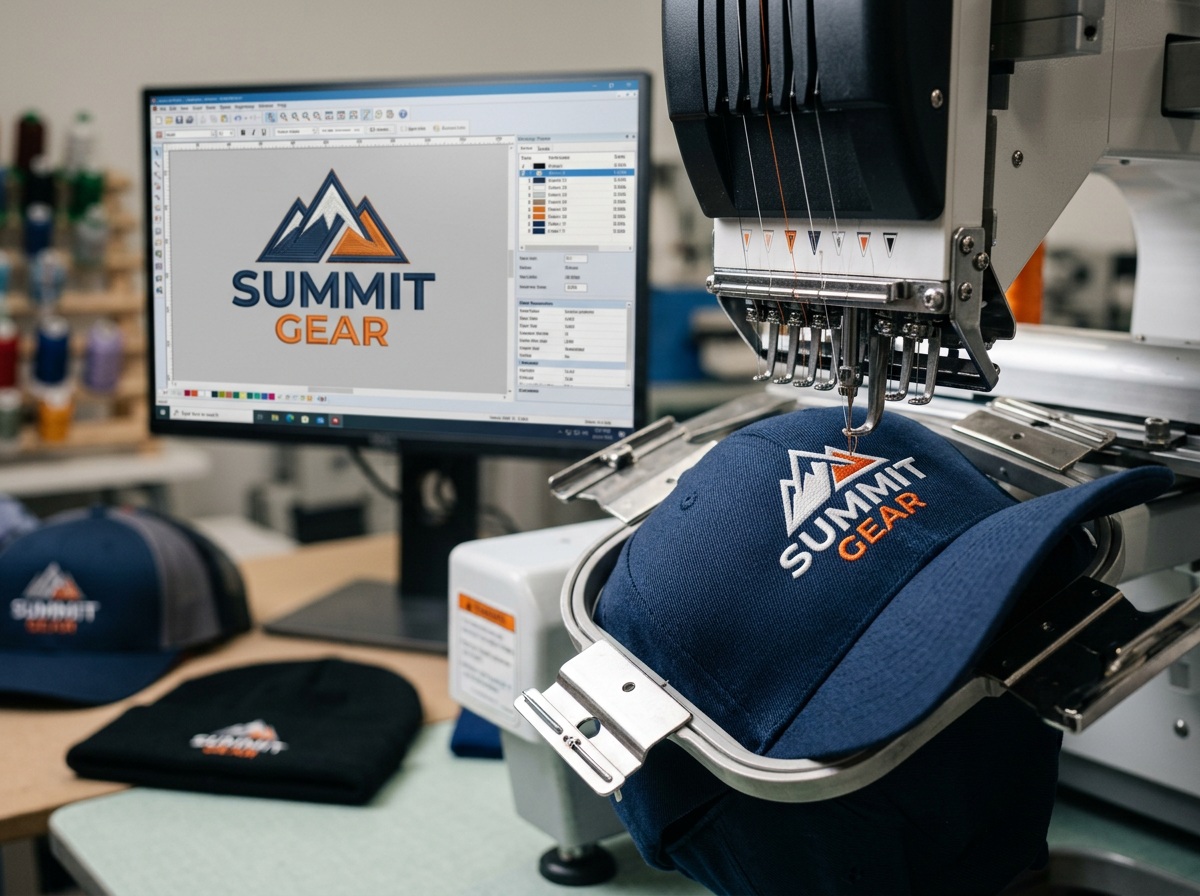
Hat embroidery digitizing is the process of converting a logo, artwork, or lettering into a stitch-ready embroidery file specifically designed for hats, caps, beanies, and other headwear. Because hats have curved surfaces, limited embroidery areas, seams, structured panels, and different fabric types, a design that works perfectly on a flat shirt may not produce the same results on a cap.
The key to successful hat embroidery is not simply converting an image into stitches. The design must be digitized with the hat's shape, fabric, embroidery area, stitch direction, density, underlay, and production method in mind.
In this guide, you'll learn how to prepare a logo for hat embroidery, what makes a good cap embroidery design, how large a logo should be, which stitch types work best, and how professional digitizing can help produce clean, durable results.
What Is Hat Embroidery Digitizing?
Hat embroidery digitizing is the specialized process of turning artwork into a digital embroidery file that tells an embroidery machine exactly how to stitch a design onto a hat or other type of headwear.
A professional digitized file contains instructions for details such as:
- Stitch type
- Stitch direction
- Stitch density
- Underlay
- Thread color changes
- Stitch sequence
- Trim and jump commands
- Design size and placement
- Pull compensation
Hat embroidery requires additional planning because the embroidery surface is rarely flat. The design needs to move over curved panels and, depending on the hat style, may need to avoid seams, eyelets, closures, or other construction details.
In simple terms: hat digitizing takes ordinary artwork and turns it into a stitch plan that is optimized for the specific construction and fabric of a hat.
Why Is Digitizing for Hats Different From Shirt Embroidery?
One of the most common mistakes is assuming that the same embroidery file can be used on every garment. While a professionally digitized design may sometimes work across multiple products, hats often require different settings from flat garments.
There are several reasons for this.
1. Hats Have Curved Surfaces
A shirt or jacket panel can usually be hooped relatively flat. A cap, however, curves around the wearer's head. As the needle moves across the design area, the embroidery machine is working on a surface that changes direction.
This can affect stitch registration, density, stitch direction, and the appearance of small details.
2. The Embroidery Area Is Smaller
Most hats provide considerably less usable embroidery space than a shirt or jacket. This means a logo may need to be simplified or resized to remain readable.
Fine details that look excellent on a large chest logo may disappear when reduced to a small cap logo.
3. Seams Can Affect Stitching
Structured caps often contain front-panel seams. A design placed across or too close to a seam can experience registration problems or uneven stitching.
Professional digitizing considers the construction of the cap before determining the final design size and stitch sequence.
4. Different Hat Fabrics Behave Differently
Cotton twill, polyester, performance fabric, wool, fleece, knit materials, and other headwear fabrics can react differently to embroidery.
The correct density, underlay, stitch type, and compensation may therefore vary depending on the material.
What Type of Artwork Works Best for Hat Embroidery?
The best artwork for hat embroidery is usually clear, simple, and recognizable at a relatively small size. Logos with strong shapes and limited fine detail are generally easier to reproduce cleanly.
Good candidates often include:
- Company logos
- Sports team-style graphics
- Monograms
- Short brand names
- Simple icons
- Bold lettering
- Simple badges and emblems
Highly detailed photographs, tiny text, intricate gradients, and extremely thin lines may need to be simplified before they can be embroidered effectively.
That does not mean complex artwork cannot be embroidered. It means the artwork may need to be redrawn, simplified, or strategically digitized to work within the physical limitations of embroidery.
How Large Should a Logo Be on a Hat?
There is no single size that works for every hat. The ideal embroidery size depends on the hat style, available sewing field, logo proportions, design complexity, and the location where the design will be placed.
For a typical front cap design, a common starting point is approximately 2 to 4 inches wide, but the actual production size should always be determined by the specific hat and design.
Before digitizing, consider:
- The usable embroidery area of the hat
- Whether the hat has a center seam
- The height and width of the logo
- The smallest lettering in the design
- The fabric and construction of the cap
- Whether the design will be worn on the front, side, back, or another location
Important: making a design smaller does not automatically make it suitable for a hat. A professional digitizer may need to adjust stitch types, density, underlay, lettering, and sequencing when reducing artwork.
Best Stitch Types for Hat Embroidery
Different elements of a logo may require different stitch types. Choosing the correct stitch is one of the most important parts of professional embroidery digitizing.
Satin Stitch
Satin stitches are commonly used for borders, lettering, outlines, and narrow shapes. They can produce a smooth, slightly raised appearance and are especially useful for bold embroidered text.
However, satin columns that are too wide can create stitching problems, while columns that are too narrow may not provide the desired coverage. The digitizer must select appropriate stitch settings for each element.
Fill Stitch
Fill stitches are useful for covering larger areas of a design. They can be used for backgrounds, larger logo elements, and broad shapes.
On hats, fill patterns and stitch directions need to be planned carefully because excessive density can create stiffness, puckering, or unnecessary bulk.
Running Stitch
Running stitches are useful for fine outlines, small details, and lightweight design elements. They can also be used for certain lettering and line-art effects.
Extremely thin details should be evaluated carefully because small stitches can become difficult to see once the design is embroidered onto textured or curved fabric.
What Is Underlay in Hat Embroidery?
Underlay is a foundation layer of stitching placed beneath the visible embroidery. It helps stabilize the fabric, support the top stitches, improve coverage, and reduce the effects of fabric movement.
Underlay can be especially important for hats because the fabric may shift or stretch while being embroidered.
The appropriate underlay depends on factors such as:
- Fabric type
- Design size
- Stitch type
- Design location
- Material stability
- Amount of detail
Too little foundation can result in poor coverage or unstable stitches. Too much can make the design unnecessarily dense and stiff.
How Should a Logo Be Positioned on a Hat?
Placement depends on the hat style and the desired appearance. The front center is the most common location for branded cap embroidery, but logos can also be placed on the side, back, or other areas.
For front embroidery, the digitizer should consider the relationship between the logo and the center seam. A design that is technically centered within a rectangular embroidery area may not appear visually centered once it is sewn onto a curved cap.
Other placement considerations include:
- Center seam location
- Bottom edge of the design
- Distance from the brim
- Hat construction
- Logo proportions
- Available sewing field
- Visibility when the hat is worn
For businesses ordering embroidered hats in bulk, it is also useful to establish a consistent placement specification so every finished hat has the same visual alignment.
How Do You Prepare a Logo for Hat Embroidery?
If you have a logo that you want embroidered on caps, preparing the artwork correctly can make the digitizing process easier and more predictable.
Step 1: Start With the Highest-Quality Artwork Available
Whenever possible, provide a vector logo or a high-resolution version of the original artwork. Common source formats may include AI, EPS, SVG, PDF, PNG, or other suitable artwork files depending on the digitizer's workflow.
A low-resolution image can still sometimes be digitized, but additional artwork cleanup or recreation may be necessary.
Step 2: Decide the Finished Size
Tell the digitizer how large you want the finished design to be. If you are unsure, provide the hat type and intended placement so the digitizer can recommend a practical size.
Step 3: Identify the Hat Material
Let the digitizer know whether the design will be embroidered on cotton, polyester, performance material, wool, fleece, knit fabric, or another material.
Material information helps determine suitable digitizing settings.
Step 4: Identify Small Details
Point out any elements that must remain recognizable, especially small text, thin lines, or important parts of the logo.
A professional digitizer can determine whether those details can be reproduced at the requested size or whether they should be simplified.
Step 5: Specify the Embroidery Location
State whether the design is intended for the front, side, back, or another area of the hat. Different locations may have different usable embroidery areas and construction challenges.
Can Any Logo Be Embroidered on a Hat?
Almost any logo can potentially be adapted for embroidery, but not every logo can be reproduced exactly as it appears on a screen.
Embroidery is made from thread rather than pixels, so artwork may need to be interpreted through stitch types and physical production limits.
For example, a logo containing tiny text may require:
- Larger lettering
- Fewer words
- A heavier font
- Reduced detail
- Different stitch settings
- A simplified version of the logo
The goal is not simply to preserve every tiny detail. The goal is to create a finished embroidered design that remains recognizable, clean, and durable.
What Causes Poor-Quality Hat Embroidery?
Several problems can cause a hat logo to look different from the original artwork.
Incorrect Design Density
Too many stitches packed into a small area can create excessive bulk, stiffness, puckering, or thread-related problems.
Insufficient Underlay
Without adequate stabilization, fabric movement can affect the quality and registration of the embroidery.
Design Too Small
Small text and fine details may become unreadable when reduced beyond what the stitch type and fabric can support.
Poor Stitch Direction
Stitch direction affects the appearance and behavior of embroidered shapes. Strategic changes in direction can improve definition and help control the way the design interacts with the fabric.
Ignoring the Hat Construction
Seams, panels, curves, closures, and fabric characteristics all influence how a design should be digitized and positioned.
Using the Same File for Every Product
A design digitized for a flat garment may not be optimized for a curved cap. Different products can require different embroidery settings.
How Many Stitches Does a Hat Logo Need?
There is no universal stitch count for a hat logo. Stitch count depends on the design dimensions, coverage, lettering, stitch types, density, and level of detail.
A simple logo may require significantly fewer stitches than a large, detailed emblem even when both designs occupy a similar area.
Rather than choosing a stitch count first, the digitizer should create the design based on the required visual result and the characteristics of the hat.
Stitch count is also one factor that can influence production time and embroidery cost, which is why efficient digitizing is important for businesses producing hats in larger quantities.
Hat Embroidery Digitizing for Different Types of Headwear
Baseball Caps
Caps are among the most common products for logo embroidery. Front-panel embroidery typically requires careful attention to the center seam, curved surface, and available sewing area.
Trucker Hats
Trucker hats often combine a structured front panel with mesh material. The front panel can support embroidery, but the construction and material should be considered when determining placement and stabilizing requirements.
Beanies
Beanies are made from stretchable knitted materials, so they require different considerations from structured caps. Design size, lettering, underlay, density, and stabilization are especially important.
Bucket Hats
Bucket hats can provide more flexible placement options, but their curved and sometimes soft construction can still affect embroidery quality. The design should be planned around the specific material and intended location.
Visors
Visors have their own shape and limited embroidery areas. Logo placement should account for the curved front and the overall proportions of the visor.
What File Format Do You Need for Hat Embroidery?
The required embroidery file format depends on the embroidery machine and software being used. Common machine embroidery formats include DST, PES, JEF, EXP, VP3, and others.
When ordering digitizing, provide the machine or embroidery system information if you are unsure which format you need.
It is also important to understand that an embroidery file is not the same as a regular image file. A JPG or PNG shows artwork visually, while a machine embroidery file contains stitch instructions that an embroidery machine can interpret.
Should You Use a Professional Hat Digitizing Service?
Professional digitizing can be especially valuable when the design will be used for business branding, uniforms, promotional merchandise, sportswear, or bulk hat production.
A professional digitizer can evaluate the artwork and make production-focused decisions about:
- Stitch types
- Density
- Underlay
- Pull compensation
- Stitch sequencing
- Small lettering
- Design simplification
- Hat placement
- Fabric behavior
- Machine file requirements
This can help reduce trial-and-error during production and improve consistency across multiple embroidered hats.
How to Get Better Results From Your Hat Embroidery Digitizing Order
If you are sending artwork to a digitizing service, provide as much useful information as possible from the beginning.
A good digitizing brief can include:
- The original logo or artwork
- Desired finished dimensions
- Hat type
- Fabric or material
- Embroidery location
- Preferred thread colors
- Required embroidery file format
- Any small details that must remain visible
- Reference photos of the hat, when available
The more information the digitizer has, the easier it is to create a file that matches the intended production application.
Hat Embroidery Digitizing: Quick Checklist
- Choose high-quality artwork.
- Confirm the finished embroidery dimensions.
- Identify the hat type and material.
- Check whether the hat has a center seam.
- Specify the embroidery location.
- Review small lettering and fine details.
- Choose appropriate stitch types.
- Use suitable underlay and density settings.
- Confirm the required machine file format.
- Test the design before large-scale production whenever possible.
Frequently Asked Questions About Hat Embroidery Digitizing
What is the best file for hat embroidery?
The best machine embroidery file depends on the embroidery machine. DST, PES, JEF, EXP, and VP3 are examples of commonly used formats. If you are unsure, provide your machine brand or model to your digitizer so the correct format can be supplied.
What size should a logo be for a hat?
A typical front cap logo may be around 2 to 4 inches wide, but there is no universal size. The correct dimensions depend on the hat style, available embroidery area, logo proportions, and design complexity.
Can a detailed logo be embroidered on a cap?
Yes, but highly detailed artwork may need to be simplified. Tiny text, thin lines, gradients, and very small elements can be difficult to reproduce accurately with thread.
Why does my embroidered hat logo look different from my digital logo?
Digital artwork and embroidery use different visual systems. Embroidery is created with stitches, so details may need to be adjusted for thread thickness, fabric movement, density, stitch direction, and the physical size of the design.
Do hats need special embroidery digitizing?
Often, yes. Hats have curved surfaces, seams, limited embroidery areas, and different fabric characteristics. A design may need settings specifically optimized for headwear rather than simply using a file created for a flat garment.
Can you embroider text on a hat?
Yes. Text is one of the most common types of hat embroidery. However, very small lettering can become difficult to read, so font choice, letter height, spacing, stitch type, and design size are important.
How do I prepare a logo for hat embroidery?
Provide the highest-quality artwork available, specify the desired size and placement, identify the hat material, and tell the digitizer which embroidery machine or file format you need. The digitizer can then adapt the artwork into a stitch-ready design.
Is hat embroidery more difficult than shirt embroidery?
Hat embroidery can require additional planning because the embroidery area is curved and often includes seams and other construction features. The digitizing settings may need to account for those conditions.
How can I avoid poor-quality embroidery on hats?
Use properly digitized artwork, choose an appropriate design size, avoid excessively small details, match the digitizing settings to the hat material, and test the design before producing a large quantity.
Final Thoughts
Successful hat embroidery starts with proper digitizing. A logo that looks perfect on a computer screen still needs to be translated into stitches that can work on a curved, sometimes textured, and limited embroidery surface.
By choosing the right design size, stitch types, underlay, density, placement, and machine format, you can achieve cleaner and more consistent results on caps, beanies, trucker hats, bucket hats, and other headwear.
If you are preparing a logo for embroidery, don't treat digitizing as a simple file conversion. Think of it as design preparation for a physical product. The right digitizing decisions can make the difference between an embroidery design that merely stitches and one that looks professional when the finished hat is actually worn.
Get Your Design Professionally Digitized
Whether you're stitching one logo or producing thousands of embroidered garments, professional digitizing is the key to achieving clean, consistent, and production-ready embroidery.
Let our experienced digitizers turn your artwork into a flawless embroidery file that stitches beautifully the first time.
Not sure what your design will cost? Send it over and we'll give you an accurate stitch count and quote before you commit.