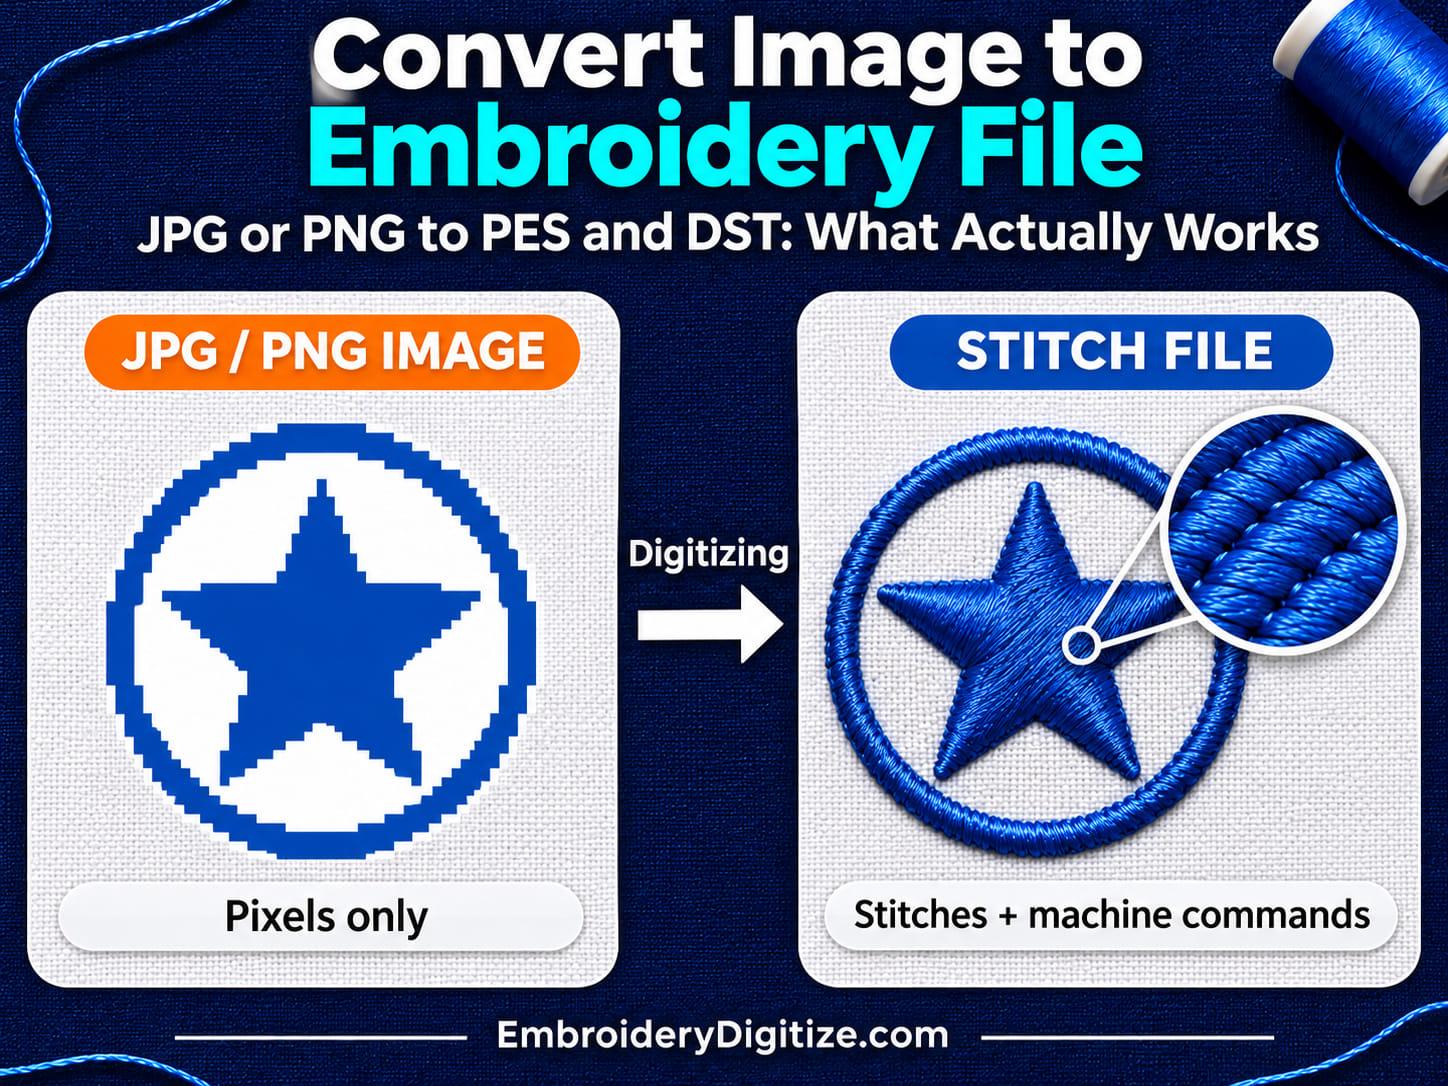
Quick answer: To convert an image to an embroidery file, the JPG or PNG has to be digitized into stitch instructions, using embroidery software or a professional digitizing service. Then you export a format your machine reads, such as PES, DST, or JEF. Renaming the file or running it through a simple file converter will not create a usable stitch design. Clean, simple artwork gives the best results. Photos usually need to be simplified or digitized with specialized techniques.
If you have searched for a way to "convert an image to an embroidery file" and landed on a free online tool, you may have noticed the results are often disappointing. That is because two very different things are being called "conversion."
In this guide, we'll explain why a JPG or PNG can't be converted like a normal file, the three real ways to turn an image into stitches, how to prepare your artwork, and which route fits which job.
Can You Convert a JPG or PNG to an Embroidery File?
Not by changing the file type alone. Converting a JPG to a PNG only rewrites the same pixels in a different wrapper. Turning an image into embroidery means making decisions that the image does not contain: where each stitch goes, what stitch type covers each area, in what order the colors sew, and how the thread should handle the fabric.
That decision-making work is called embroidery digitizing. A tool that promises a one-click "JPG to PES" result is really running automatic digitizing behind the scenes, and the quality depends heavily on the image you give it.
Why an Image File and an Embroidery File Are Different
A raster image such as a JPG or PNG stores a picture as pixels. It says what color each tiny square is. It says nothing about thread.
A stitch file such as PES, DST, or JEF is a set of machine instructions. According to the University of Geneva's embroidery format reference, stitch data is made of records that each hold a command plus a movement in X and Y, and commands handle actions like changing thread and trimming. Formats also differ in what else they store, such as headers or color information. Many designs are first built as shapes in digitizing software and then compiled into a stitch file.
| Feature | JPG / PNG image | PES / DST stitch file |
|---|---|---|
| What it stores | Pixels and colors | Stitch positions and machine commands |
| Knows about thread? | No | Yes: color-change, trim, and jump commands. Some formats, such as DST, do not store actual thread colors |
| Knows about stitch type? | No | Result of satin, fill, or running stitch choices |
| Can an embroidery machine read it? | No | Yes, if the format matches the machine |
| Can you resize it freely? | Pixels blur when enlarged | Resizing changes stitch density, so it needs care |
What Is the Difference Between Digitizing and Converting?
Digitizing turns artwork, such as a logo, into a new stitch file. Converting changes a file that is already a stitch file from one machine format to another, for example from DST to PES.
Our free embroidery format converter does the second job only. It converts files that are already digitized. It lists PNG and SVG among its supported formats, but that means a stitch file can be exported as a picture of the design. It does not mean a picture can be turned into stitches. For that, you need digitizing. See our guide on how the embroidery format converter works.
Conversion also has limits. It can change the format, but it cannot restore editable objects, thread information, or other details that the new format does not store. Always check that the converted file works on your machine model.
3 Ways to Turn a JPG or PNG Into an Embroidery File
1. Digitize It by Hand in Embroidery Software
A digitizer loads your image into software such as Wilcom EmbroideryStudio, traces over it, and chooses the stitch type, direction, density, underlay, and sewing order for each area. This takes skill but gives the most control and the cleanest results, especially for logos and lettering. Our step-by-step guide to digitizing a logo walks through the process.
2. Use Auto-Digitizing Software
Many programs can generate stitches from an image automatically. They detect the colors and shapes and apply default stitch settings. This is fast and can work well on simple, bold artwork. It struggles with fine detail, gradients, and photographs, and it often needs manual cleanup afterward. Wilcom's own documentation says that embroidery digitizing works least effectively with photographic images.
3. Order Professional Digitizing
You send your artwork, the size you need, the garment type, and your machine's file format. A digitizer builds the stitch file in the format your machine reads. You should still test it on your own fabric and machine before production. This is the usual route for business logos, caps, patches, and anything you plan to stitch many times. You can read more in our guide to embroidery digitizing services.
| Method | Best for | Main limit |
|---|---|---|
| Manual digitizing | Logos, lettering, detailed designs | Needs software and skill |
| Auto-digitizing | Simple, bold, flat-color artwork | Weak on fine detail and photos, often needs cleanup |
| Professional digitizing | Business use, caps, patches, repeat orders | You pay for the service instead of doing it yourself |
How to Prepare Your JPG or PNG for Embroidery
Whichever route you choose, better artwork gives better stitches. Wilcom's guidance for auto-digitizing says that "clean" images with a limited number of solid colors and well-defined outlines work best. Use this checklist:
- Start from the original. If you have the logo as a vector file (SVG, AI, or EPS), send that. If you only have a pixel image, use the largest, sharpest version you can find.
- Use high resolution. Wilcom recommends 300 DPI images instead of low-resolution 96 DPI screen images.
- Choose PNG over JPG when you can. Wilcom's guidance recommends PNG rather than JPG, and its help pages note that JPG files are inherently noisier.
- Keep the colors few and flat. Gradients, shadows, and soft glows do not translate into thread. Each extra color usually adds another thread change.
- Use a plain or transparent background. It makes it easier to keep unwanted areas out of the stitching, though you should still confirm which parts will be stitched.
- Avoid tiny details and thin text. Very small lettering and hairline strokes may not stitch clearly. See our embroidery design sizing and placement guide for size limits.
- Know your final size. Tell the digitizer the exact width and height. A design digitized for one size should not simply be scaled to another.
If your artwork is a photo, expect the result to be simplified. One practical option is to turn the photo into a high-contrast graphic or line-art version first. Our guide on line art digitizing for pet pictures shows one example.
What Is the Step-by-Step Process?
- Prepare the artwork. Use the checklist above.
- Digitize it. Do it yourself in embroidery software, use an auto-digitizing tool, or send it to a digitizer.
- Export the right format. Save the design in the format your machine reads.
- Stitch a test. Sew it on a scrap of the real fabric, then adjust if needed.
Which Embroidery File Format Should You Ask For?
Choose the format your machine reads, not the one you like best.
| Format | Commonly used with | Worth knowing |
|---|---|---|
| PES | Brother embroidery machines | Check your exact machine model |
| DST | Commercial embroidery and Tajima machines | Does not normally store actual thread colors |
| JEF | Janome machines | Check your model and hoop size |
| VP3, HUS, EXP, XXX | Pfaff, Husqvarna Viking, Melco, Singer and others | Check your machine's manual |
For more detail, see what a DST file is and our comparison of PES vs DST vs JEF. Once you have a digitized file in one format, you can often convert it to another with a format converter.
Common Mistakes When Converting an Image to an Embroidery File
Expecting a Photo to Stitch Like a Photo
Thread cannot reproduce smooth gradients or tiny shading. Photos need simplifying before they stitch well.
Using a Low-Resolution or Screenshot Image
Blurry edges lead to wobbly stitch outlines. Always start from the best source you have.
Trusting a Free Converter With Business Work
A free one-click result can be useful for testing. For a logo that will go on customer garments, it is a risk, because auto-generated stitches may have poor density, bad stitch order, or too many jumps and trims. Always do a test stitch-out before production.
Skipping the Test Stitch
Even a well-digitized design should be sewn on a scrap of the real fabric first. Fabric, thread, and machine all change how the final result looks.
Frequently Asked Questions
Can I convert JPG to PES for a Brother machine?
Not by file conversion alone. The JPG has to be digitized into stitches first, then saved as a PES file. Whether a given PES file works on your Brother machine also depends on the model, so check the manual.
Can I convert PNG to DST for commercial embroidery?
Yes, but through digitizing, not simple conversion. A PNG with clean edges, few colors, and a transparent background is a good starting point. The finished design is then saved as a DST file.
Is a free JPG to DST converter accurate?
It depends on the artwork. Free tools can work on simple, bold, flat-color graphics, but detailed images and photos often come out with poor stitch quality and need manual cleanup. Always do a test stitch before using the file for real orders.
Can I change a DST file into PES without redigitizing?
Often yes. A format converter can change an existing DST file to PES. It cannot restore editable objects or thread information that DST does not store, so check the result in your software or on a test stitch.
Can I convert a JPG to an embroidery file for free?
You can try free auto-digitizing tools, but a JPG cannot be converted by a simple file converter, because the image has no stitch data. Free tools work best on simple, flat-color graphics and usually need manual cleanup.
What is the difference between an image file and an embroidery file?
An image file stores pixels. An embroidery file stores stitch positions and machine commands such as color changes and trims.
Why does my converted JPG look bad when stitched?
Common causes are a low-resolution image, too many colors, gradients, tiny details, or automatic settings that do not suit the fabric. Digitizing the artwork properly and doing a test stitch usually fixes these problems.
Is PNG or JPG better for embroidery?
PNG is usually better. Wilcom recommends PNG rather than JPG, and notes that JPG files are inherently noisier. A vector file is better than either.
Can a photo be turned into embroidery?
It can, but the result will be a simplified version of the photo. Wilcom notes that embroidery digitizing works least effectively with photographic images. A line-art or high-contrast version usually stitches better.
Does your free converter turn a logo into an embroidery file?
No. Our free converter changes the format of embroidery files that are already digitized, for example DST to PES. To turn a logo or image into a stitch file, you need embroidery digitizing.
What file format should I ask my digitizer for?
Ask for the format your machine reads. PES is common on Brother machines, JEF on Janome, and DST in commercial embroidery. If you are unsure, check your machine's manual.
Final Thoughts
There is no true "one-click JPG to embroidery" conversion, because an image does not contain the decisions that make stitches work. The real choice is how the digitizing gets done: by hand, with auto-digitizing software, or by a professional.
Start with clean, high-resolution artwork, ask for the file format your machine uses, and always stitch a test before production.
Sources and Further Reading
The preparation guidance in this article reflects general digitizing practice. Exact requirements depend on your software, machine, fabric, and thread.
- Choosing suitable artwork (Wilcom EmbroideryStudio help): clean artwork, 300 DPI, PNG rather than JPG, and photographs as the least effective input.
- Embroidery format (University of Geneva, EduTech Wiki): stitch files versus design files, and the commands stitch files contain.
Need a Logo or Image Digitized?
Turn your logo, artwork, or custom design into a production-ready embroidery file.
Create your free EmbroideryDigitize account and submit your artwork, required size, garment type, and preferred embroidery format.
Existing customer? Login here.
If you already have an embroidery file but need another machine format, use our Free Embroidery Format Converter to convert supported embroidery files online.