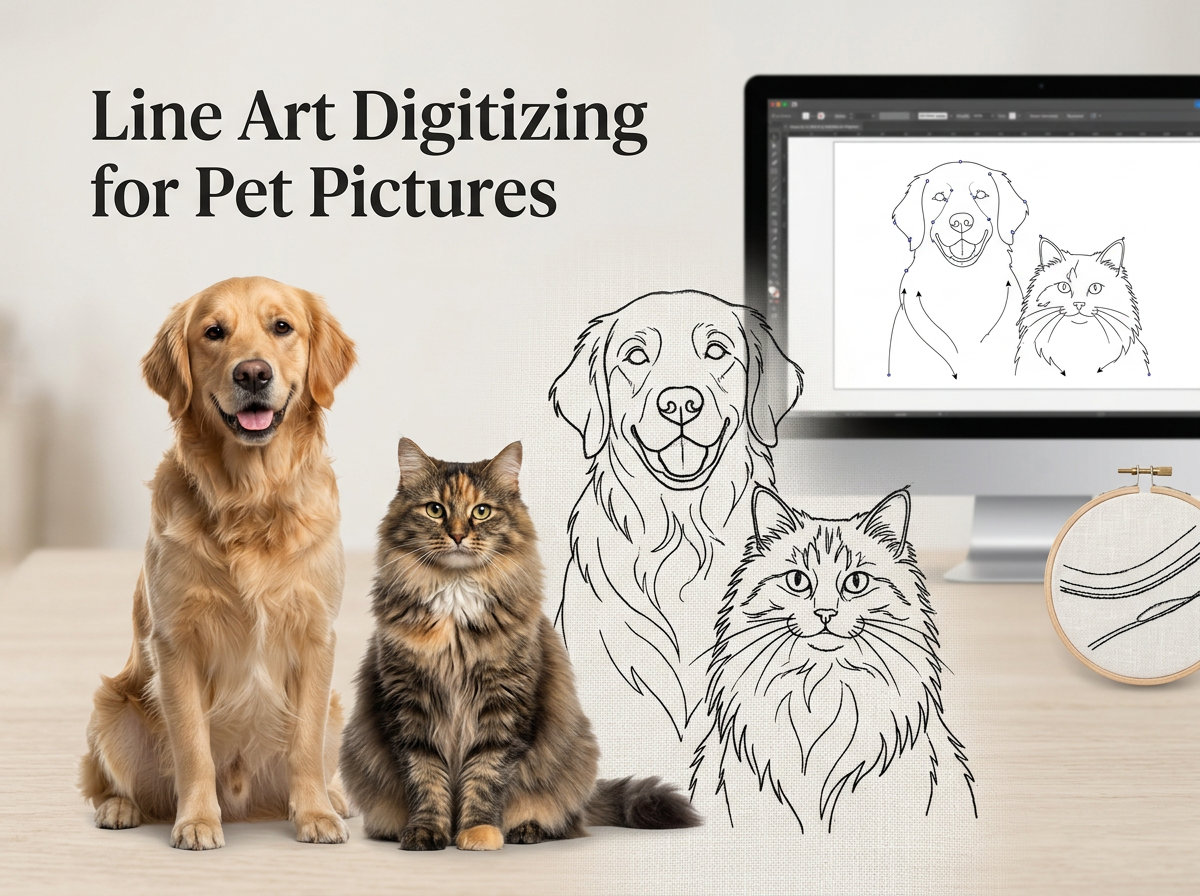
Line Art Digitizing for Pet Pictures: Turn Your Favorite Pet Photos into Embroidery
Pets are more than animals—they are part of the family. From a playful puppy to a beloved cat, a favorite pet photo can hold years of memories. One creative way to preserve that special connection is through line art digitizing for pet pictures.
Pet line art embroidery transforms a photograph into a clean, artistic embroidery design that highlights the most recognizable features of your pet. Instead of reproducing every detail of a photo, the digitizing process focuses on important outlines, facial features, expressions, and distinctive characteristics.
Whether you want to create a personalized embroidered sweatshirt, pet memorial, hat, tote bag, wall decoration, or gift, properly digitized line art can turn an ordinary pet picture into a meaningful piece of embroidery.
What Is Line Art Digitizing for Pet Pictures?
Line art digitizing is the process of converting an image into an embroidery-ready design using carefully planned stitch paths. For pet pictures, the goal is usually to simplify a photograph into recognizable lines while maintaining the personality and appearance of the animal.
Unlike traditional photo embroidery, which may use many colors and dense stitching, line art designs generally rely on a limited number of lines and stitch elements. The result can be simple, elegant, modern, and highly personal.
A good pet line art design does not necessarily reproduce every part of the original photograph. Instead, it identifies the visual features that make the pet recognizable and converts those features into stitches.
Why Pet Pictures Work So Well for Line Art Embroidery
Animals often have distinctive facial structures, ears, noses, eyes, fur patterns, and body shapes. These characteristics can be represented effectively with carefully placed embroidery lines.
For example, a dog's floppy ears, nose, eyes, collar, and facial outline may be enough to create a recognizable embroidery design. Similarly, a cat's pointed ears, whiskers, eyes, and facial contours can create a beautiful minimalist result.
The simplicity of line art also makes it suitable for a wide range of embroidery products. A small design can be placed on a cap or pocket, while a larger version can be used on sweatshirts, jackets, blankets, cushions, and framed embroidery.
Choosing the Right Pet Photo
The quality of the final embroidery begins with the quality of the source image. A professional digitizer can work with many types of photographs, but some images provide much better results than others.
1. Choose a Clear Image
A sharp, high-resolution photograph makes it easier to identify important facial and body features. Avoid extremely blurry images whenever possible.
2. Use Good Lighting
Photos with sufficient lighting help reveal the pet's eyes, nose, ears, and facial structure. Very dark images can make important details difficult to interpret.
3. Avoid Excessive Background Detail
A busy background can distract from the animal and make the digitizing process more complicated. A simple background or a photo where the pet is clearly separated from its surroundings is often ideal.
4. Show the Pet's Face Clearly
If the goal is a portrait-style line art design, a front-facing or three-quarter view can work particularly well. The eyes, nose, ears, and facial contours should be visible.
5. Pick a Meaningful Photo
Technical quality matters, but emotional value matters too. A slightly imperfect photograph can still produce a wonderful embroidery design if it captures the pet's personality or a special memory.
How Pet Photo Line Art Digitizing Works
Creating an embroidery-ready pet line art design requires more than simply tracing a photograph. The image must be interpreted and converted into stitchable artwork.
Step 1: Analyze the Photograph
The first step is to study the pet photo carefully. The digitizer identifies the most important characteristics, including the overall silhouette, facial structure, eyes, nose, ears, mouth, fur direction, collar, and other distinctive features.
The goal is to determine which details are essential and which can be removed without affecting recognition.
Step 2: Simplify the Image
Photographs contain thousands of visual details that cannot always be translated effectively into embroidery. Line art requires selective simplification.
Unnecessary shadows, background objects, tiny fur details, and visual noise may be removed. The remaining lines are arranged to preserve the pet's identity.
Step 3: Create the Artwork
The simplified design is then converted into clean digital artwork. Curves and contours should be smooth and intentional rather than appearing rough or randomly traced.
This stage is particularly important because poor artwork can lead to unnecessary stitches and an unclear final embroidery.
Step 4: Convert Artwork into Stitches
The artwork is then digitized for the target embroidery machine. The digitizer chooses appropriate stitch types, stitch directions, densities, and sequencing.
For many line art designs, satin stitches, running stitches, and other fine-line techniques may be used depending on the design size and fabric.
Step 5: Plan Stitch Direction and Sequence
Embroidery is created stitch by stitch, so the order of stitching matters. A good sequence can reduce unnecessary jumps, thread changes, and overlapping stitches.
Stitch direction should also support the visual structure of the pet. Curved facial contours, ears, whiskers, and other elements may require carefully planned stitch paths.
Step 6: Test and Refine the Design
A design that looks perfect on a computer screen may behave differently when embroidered. This is why sampling is an important part of professional digitizing.
The test embroidery can reveal problems such as excessive density, uneven lines, fabric distortion, thread breaks, tiny details disappearing, or outlines becoming too heavy.
The digitizer can then adjust the design before producing the final embroidery file.
Important Features to Preserve in Pet Line Art
The success of a pet portrait often depends on preserving a few highly recognizable features rather than attempting to include everything.
- Eyes: The eyes are often one of the most important features for capturing personality.
- Nose: A properly shaped nose can help define the animal's face.
- Ears: Ear position and shape can make a pet immediately recognizable.
- Face shape: The outline of the head and muzzle provides important structure.
- Whiskers: These can add character to cat and other pet portraits when the design size allows them.
- Collars and accessories: A collar, tag, bow, or other recognizable accessory can add personality.
- Distinctive markings: Important spots, patches, or coat patterns may be included when they can be embroidered clearly.
Why Simplicity Is Important
One of the biggest mistakes in pet line art digitizing is trying to include every detail from the photograph.
Embroidery has physical limitations. Thread has thickness, fabric moves, and very small details may merge together. Adding too many lines can make a design look crowded rather than detailed.
Effective simplification is not the same as losing detail. It means choosing the right details.
A skilled digitizer asks: Which lines help identify this pet? Which details communicate its expression? Which features will remain visible after stitching?
This approach often produces a cleaner and more attractive result than attempting to copy the photograph literally.
Choosing the Right Stitch Type
Different elements of a pet line art design may require different stitch approaches.
Running Stitch
Running stitches are commonly useful for delicate outlines and fine details. They can create a lightweight, sketch-like appearance that works especially well for minimalist designs.
Satin Stitch
Satin stitches can create smooth, more prominent lines. They may be useful for stronger outlines or selected features when the design size and fabric support them.
Fill Stitches
Fill stitches can be used when the design needs larger areas of coverage. However, line art designs generally benefit from restraint, and unnecessary fills can make a minimalist portrait look heavy.
Choosing the Correct Design Size
Size has a major impact on the amount of detail that can be included.
A small pet portrait intended for a cap cannot contain the same level of detail as a large design intended for the back of a jacket. Tiny eyes, whiskers, fur lines, and facial details may become unclear when reduced too far.
Before digitizing, consider where the design will be embroidered and how large it needs to be.
- Caps and small pockets: Use simplified shapes and fewer details.
- T-shirts and sweatshirts: Medium-sized portraits allow more facial detail.
- Jackets and blankets: Larger areas can support more complex line work.
- Framed embroidery: Larger artwork may allow additional contours and decorative elements.
Fabric Matters in Pet Line Art Embroidery
The same digitized design can produce different results on different fabrics.
Stretchy fabrics such as lightweight jersey may require additional consideration for stabilization. Dense or textured fabrics can also affect how fine lines appear.
For smooth fabrics, delicate line work may appear crisp and clean. On textured materials, the design may need stronger lines or slight adjustments to remain visible.
Professional digitizing should therefore consider the intended fabric rather than treating every embroidery project identically.
Common Mistakes in Pet Line Art Digitizing
Too Many Details
Adding every visible fur strand or tiny facial feature can make the design unnecessarily complicated. Selective detailing usually produces a cleaner result.
Lines That Are Too Thin
Extremely thin lines may not stitch reliably or may become difficult to see on the finished product. The design should be created with embroidery limitations in mind.
Incorrect Stitch Density
Too much density can create bulky embroidery, fabric distortion, or unnecessary thread usage. Too little density can make elements look weak or incomplete.
Ignoring the Fabric
A design digitized for a stable fabric may need adjustments when used on stretchy or textured material. Fabric type should be considered before finalizing the embroidery file.
Poor Stitch Sequencing
Unnecessary jumps and inefficient sequencing can increase production time and create avoidable thread trims. Thoughtful sequencing helps produce a cleaner and more efficient design.
Not Testing the Design
A digital preview is useful, but it cannot always predict the exact appearance of physical embroidery. Sampling helps identify problems before production.
How to Make Pet Line Art More Personalized
One of the best things about pet embroidery is the ability to customize the design.
You can incorporate the pet's name, adoption date, birth year, favorite phrase, collar tag, or a small decorative element. For memorial pieces, owners may also include meaningful dates or a short message.
Personalization should complement the portrait rather than overpower it. A simple name beneath a clean line art portrait can often be more effective than adding too many decorative elements.
Pet Memorial Embroidery Using Line Art
Line art digitizing can be especially meaningful for memorial embroidery. A favorite photograph can be transformed into a simple stitched portrait that preserves the memory of a beloved companion.
Memorial designs can be created on cushions, blankets, framed embroidery, clothing, or other keepsakes. A pet's name and meaningful date can be added to make the design even more personal.
Because line art can be understated and elegant, it is particularly suitable for remembrance pieces where the goal is to create something personal rather than overly decorative.
Line Art vs. Photo Realistic Pet Embroidery
Both styles have their place, but they create very different visual effects.
- Line art embroidery: Minimal, clean, artistic, lightweight, and often easier to use for smaller personalized products.
- Photo realistic embroidery: More detailed and complex, with greater emphasis on shading, color, texture, and photographic appearance.
If you want a modern and minimalist design, line art is an excellent choice. If your priority is reproducing the photograph with extensive shading and color, a more complex photo embroidery approach may be better.
Tips for Getting Better Pet Embroidery Results
- Start with the clearest pet photograph available.
- Choose a photo where the pet's important features are visible.
- Tell the digitizer the intended embroidery size.
- Specify the fabric or garment whenever possible.
- Decide whether you want a minimalist or more detailed appearance.
- Avoid requesting unnecessary tiny details in very small designs.
- Consider adding the pet's name for personalization.
- Request a test stitch-out when the design is complex or especially important.
Frequently Asked Questions About Pet Line Art Digitizing
Can any pet photo be converted into line art embroidery?
Most pet photos can be used as a starting point, but the quality and composition of the photograph affect the final result. Clear images with visible facial features generally provide the best foundation.
Can you digitize a photo of a dog or cat?
Yes. Dogs and cats are particularly popular subjects for line art embroidery. Other pets can also be converted into line art designs as long as their important features can be identified from the source image.
Does line art embroidery use many colors?
Not necessarily. Many line art designs use one thread color for a clean, minimalist appearance. However, multiple colors can be incorporated when they improve the design or match the pet's distinctive characteristics.
Can pet line art be embroidered on clothing?
Yes. Pet line art can be used on shirts, sweatshirts, jackets, hats, bags, and many other embroidered products. The design should be digitized according to the intended garment, fabric, and size.
How detailed should a pet line art design be?
The appropriate level of detail depends primarily on the design size and intended application. A larger embroidery can support more detail, while a small design usually needs greater simplification.
Why does the embroidery look different from the digital preview?
A digital preview cannot perfectly represent thread behavior, fabric texture, stitch direction, and physical density. A test stitch-out provides a more accurate indication of how the finished design will look.
Final Thoughts
Line art digitizing for pet pictures combines technology, embroidery, and personal memories to create something truly unique. Instead of simply printing a pet photograph, you can transform the image into a stitched piece of art that can be worn, displayed, or given as a meaningful gift.
The key to a successful pet line art design is thoughtful simplification. The best designs do not attempt to reproduce every detail. They focus on the features that make the pet recognizable while using embroidery techniques that work with the chosen fabric, size, and application.
Whether you are creating a portrait of a current companion, a personalized gift for a pet lover, or a memorial for a pet that has passed away, professionally digitized line art can turn a favorite photograph into a lasting embroidered keepsake.
Have a favorite pet photo you'd love to turn into embroidery? Start with a clear image, choose the right size and fabric, and work with an experienced digitizer who understands how to translate photographic details into clean, stitch-ready artwork.
Get Your Design Professionally Digitized
Whether you're stitching one logo or producing thousands of embroidered garments, professional digitizing is the key to achieving clean, consistent, and production-ready embroidery.
Let our experienced digitizers turn your artwork into a flawless embroidery file that stitches beautifully the first time.
Not sure what your design will cost? Send it over and we'll give you an accurate stitch count and quote before you commit.