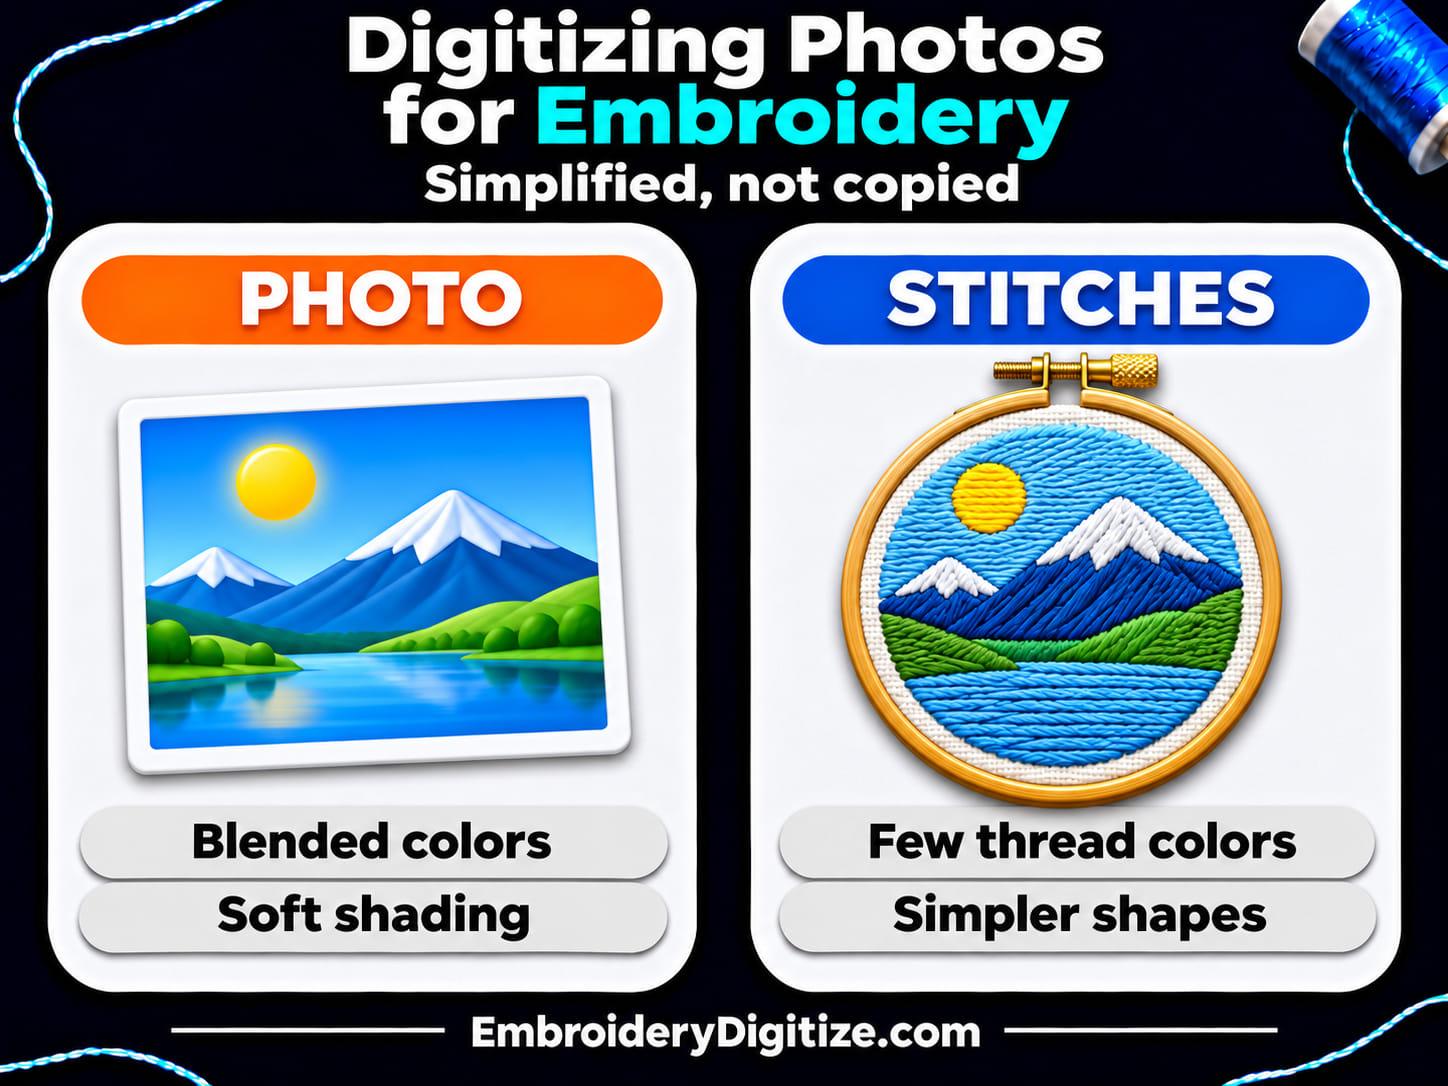
Quick answer: You can digitize a photo for embroidery, but the stitches simplify it rather than copy it. Photo-stitch tools turn a photo into thread-colored stippling or rows of stitches, while hand digitizing turns it into solid shapes. Start with a sharp, high-contrast photo of one clear subject, keep the thread colors few, and test-stitch before you commit.
A photograph blends many colors and fine shading, while an embroidery file is a list of stitches in a limited number of thread colors. Someone or something has to decide which tones become which threads and which way the stitches run, so a photo cannot be converted to a stitch file like a normal file. This guide covers machine embroidery; a pattern for hand stitching is a different job. It explains your options, what photo-stitch tools produce, which photos work, how many thread colors to use, how to prepare and check the file, and when line art is the better choice. For the wider question of turning any image into a stitch file, see our guide to converting an image to an embroidery file. For one popular case, see our guide to line art digitizing for pet pictures.
The facts come from the vendors' own help pages (Wilcom, Hatch and Brother), an independent EduTech Wiki tutorial and our own service pages, all opened on November 21, 2026. We did not install or test any photo-stitch tool, and we did not stitch a photo for this guide. The tools named here are examples, not a complete list. Vendors change their products and some pages describe older versions, so check the page for the version you use. EmbroideryDigitize sells digitizing services, which the last sections describe.
Can You Digitize a Photo for Embroidery?
Yes, with limits. Wilcom's help is direct about the difficulty: "Embroidery digitizing works least effectively with photographic images which may contain many dithered colors and complex forms." It also points to a way forward: "With photographs, however, you can pick out shapes that you want to embroider, leaving out unnecessary detail." And its software has tools made for the job: "EmbroideryStudio provides dedicated techniques for auto-digitizing photographs." Hatch and Brother describe photo tools in their programs too (see the table below).
None of these tools aims for a perfect copy. Wilcom says the goal for any photo is "to employ the fewest colors/threads to obtain the fewest stitches and trims for a good result." It also warns that "Results depend greatly on the resolution, color depth, and quality of source images," so the same tool can give a good result on one photo and a poor one on another. A stitched photo is a simplified picture made of thread. How good it looks depends on the photo, the size, the settings and the thread.
What Are Your Options for Turning a Photo into Stitches?
There are four common routes. The first three describe how the stitches get made. The fourth is ordering the file from a digitizer, who then chooses one of the other methods. The table summarizes each route and where its description comes from.
| Route | What you get | Where it suits | What to watch |
|---|---|---|---|
| A photo-stitch tool in embroidery software | The software converts the photo into stitches with a dedicated method. Vendors describe rows of stitches like "the output of a line printer," open stitching "reminiscent of a coral reef," or "variegated stitching using multiple thread colors." | Keepsakes and gifts at larger sizes, if you have the software. Wilcom says Photo Flash "can be used for keepsakes and mementos, as well as commercial embroidery." | It needs settings and testing, and it is a feature of specific products. Hatch's FAQ calls PhotoStitch "a set of photographic auto-digitizing tools exclusive to Hatch Digitizer." |
| One-color line art | The photo is traced into a drawing and digitized in a single thread color. | Small sizes. Our pet line art page says "Line art stays sharp at left chest and cap sizes, where a full photo-style portrait would lose its detail." | A line drawing is not a color likeness. Our page describes the service for photos of pets. |
| Simplified artwork, digitized by hand | A digitizer picks the shapes worth stitching, reduces the colors and builds stitches for each shape. Wilcom says you can "pick out shapes that you want to embroider, leaving out unnecessary detail." | Subjects with clear outlines and a few main colors. Wilcom says clean images with "a limited number of solid colors" and "well-defined outlines" work best. | The result depends on what the digitizer keeps and drops, so say what matters most to you. |
| Ordering digitizing | You send the photo and your instructions, and a digitizer prepares the stitch file. | When you do not own the software or want a file for a specific machine. | Our service pages say "a photo or sketch is fine to start from." They do not name a photo-stitch method, so say what you expect and ask which approach suits your photo, size and fabric. The checklist below shows what to send. |
Our guides to auto digitizing vs manual digitizing and what embroidery digitizing is explain the difference between the software route and the hand route in more detail.
What Do Photo-Stitch Tools Actually Produce?
Each vendor uses its own names and methods. The table gives the vendors' own words about their tools, and we did not test any of them.
| Tool | What its documentation says | Things to note |
|---|---|---|
| Wilcom EmbroideryStudio: Photo Flash | Photo Flash designs "consist of rows of stitches of varying spacing settings." The software generates "a single monochrome stitch object," and "The effect resembles the output of a line printer." Both color and grayscale photos can be used. | One thread color. You choose a light or dark background setting, and Wilcom says "The Dark option produces a negative of the image." |
| Wilcom EmbroideryStudio: Reef PhotoStitch | "The effect is reminiscent of a coral reef, hence the name." The technique produces embroidery with "a low stitch count based on the color contrast present in the image" and "works best with images containing clearly defined areas with high-contrast colors." | One thread color. The help gives 400 mm (16 in) as the size limit for the image. |
| Wilcom EmbroideryStudio: Color PhotoStitch | "While Photo Flash and Reef PhotoStitch produce designs in single-color stitching, Color PhotoStitch produces variegated stitching using multiple thread colors." It "analyzes the photo and generates a thread color list based on image colors." Wilcom's artwork page says "The overall effect is like multi-colored stippling." | You decide how many colors to keep. See the color table below. |
| Hatch Embroidery: PhotoStitch tools | Hatch's FAQ lists Color PhotoStitch, Reef PhotoStitch and PhotoFlash. A 2018 Hatch article says of PhotoFlash: "Color images are automatically converted to grayscale." | Hatch's September 2024 article says "Color PhotoStitch is only available in Hatch Embroidery Digitizer level." Check which level you own. |
| Brother PE-DESIGN 11: Photo Stitch 1 and 2 | Photo Stitch 1 patterns have "detailed and overlapping stitching" and can be made in "color (Color), sepia (Sepia), grayscale (Gray) or one color (Mono)." Photo Stitch 2 "contains repeating zigzag stitches," which gives "a more general rendering" with "well-regulated stitching." | Brother's tutorial uses a thread chart made for photo stitching and says to adjust the thread color list if the screen colors differ from your real threads. |
The table shows two broad looks. Wilcom's Photo Flash and Reef PhotoStitch and Brother's Mono option use one thread, so the picture itself needs no color changes. The multi-color methods use several threads, and Wilcom says "every thread change counts," which is why the color count matters (see below).
Which Photos Work Best?
The sources repeat a few recommendations: a sharp image, good contrast and a clear subject. Not every source covers every point, and the details differ from program to program.
| Photo trait | What the sources say |
|---|---|
| Sharp and in focus | Wilcom: "For best results, use crisp images with well-defined subjects and strong contrasts." Hatch's FAQ: "Clean, high-contrast photographs with good resolution produce the best results." Our pet line art page says "Blurry, dark or far-away photos lose the details that make line art look like your pet." |
| Strong contrast and good light | Hatch's 2024 article: "Faces and portraits are ideal, especially with good lighting and contrast." Brother's manual lists "Photos where the subject appears dark, such as photos taken in a room or taken with backlighting" among photos that are "not appropriate for creating embroidery patterns." |
| A subject that fills the frame | Brother's manual also lists "Photos where the subject is small, such as in photos of gatherings." Hatch's tip: "Crop your image before importing to focus on the main subject." |
| A simple background | Hatch: "Avoid busy backgrounds or low-light/blurry images." Wilcom's Photo Flash page says "If the image has a transparent background, Photo Flash ignores it." |
| Enough pixels, but not too many | Brother's manual says "An image with a width and height between 300 and 500 dots is suitable." An independent tutorial for Stitch Era, a different program, describes pictures for designs 10 to 16 cm wide, which it puts at 1000 to 1600 pixels wide, with at least 5 pixels per mm. These are program-specific figures, not universal requirements, so follow the help for the one you use. |
The Stitch Era tutorial is on the EduTech Wiki, which marks it as incomplete and a rough draft, with its last major update in October 2017. Read it as a second opinion, not a standard. It agrees on the main point: "The picture should have good contrasts." If your only photo is dark, blurry or far away, a different photo will help more than any setting.
How Many Thread Colors Does a Photo Need?
Fewer than most people expect. The sources give different numbers because their tools and versions differ, but they point the same way.
| Source | Guidance on color count |
|---|---|
| Wilcom (Color PhotoStitch help) | For a grayscale photo, "5-6 shades which gradually change from white/light gray to dark gray/black are usually enough." "For a simple color photo, 7-10 colors may be enough." For a complicated photo, "14-16 colors may be good enough. Try to limit colors to no more than 20 as every thread change counts." |
| Hatch (2018 article) | "Usually, 7 to 10 colors produce the best results." The article also says "the thread count is limited to 15 colors." It is a 2018 article, so check the limit in your current version. |
| Brother PE-DESIGN 11 (tutorial) | The example first allows up to 20 colors. It then reserves four colors, including the background and the lips, and lowers the limit to 10. |
More colors do not always help. Wilcom says "There will be a point of diminishing returns where more colors do not necessarily result in greater design clarity or stitchability." Wilcom's help also says a color that covers more than 5% of the whole area "will be included by default." Brother's tutorial deals with small but characteristic colors by reserving them: it reserves a deep rose for the lips before it lowers the color limit.
Choosing the real threads matters as much as the count. Wilcom says "Choosing the right thread is key to a good result," and that after the design is created "you can then pick a thread for each color prior to production." Brother's manual adds that "If the actual thread colors differ from the thread colors on the screen, the embroidering results will be greatly affected."
How Do You Prepare a Photo for Digitizing?
Wilcom's help says "a degree of preparation is needed for any of the photographic auto-digitizing techniques." These steps combine the vendors' advice. Work in this order, because later steps depend on earlier ones.
- Choose the sharpest original. Use the largest, sharpest file you have, ideally the original from your camera or phone. Our service pages say "A clear, high-resolution image gives the best result."
- Crop to the subject. Hatch says "Crop your image before importing to focus on the main subject," and Wilcom's steps include "Crop the image as necessary."
- Simplify the background. Hatch says to avoid busy backgrounds. Wilcom's Photo Flash ignores a transparent background, which is one way to leave the background unstitched.
- Adjust brightness and contrast. Wilcom's steps say: "First, try clicking Auto Adjust to allow the software to optimize image settings." Then fine-tune brightness and contrast if needed.
- Reduce the colors if your tool needs it. Wilcom's Color PhotoStitch help says to use Flatten "to condense the photo to solid color blocks," and warns that for low-resolution or pixelated images this may affect detail. Its older help describes a separate tool that reduces the number of colors and removes image noise.
- Size it once. Wilcom says "Limit the amount of resizing done in EmbroideryStudio so as to retain as much image information as possible."
- Pick real threads before production. Match the palette to threads you own or plan to buy, then check the preview again.
How Big Should a Photo Embroidery Design Be?
Photo designs need room. The vendors give different figures, so the table lists each one with its source.
| Source | Size guidance |
|---|---|
| Brother PE-DESIGN 11 (Photo Stitch 1 tutorial): minimum sizes for that tool | Minimum sizes listed for that tool: 100 × 100 mm for a face only and 130 × 180 mm for head and face. That is about 4 × 4 inches and about 5 × 7 inches. They are the tutorial's figures, not universal limits. |
| Wilcom (older e4 help) and Hatch (2018 article): a suggested working size | An optimal size of 150 × 150 mm, about 6 × 6 inches. Wilcom's older help says 210 mm "is about the limit for optimal results," while Hatch's article says "210mm is the limit." |
| Wilcom (current Reef PhotoStitch and Color PhotoStitch help): a source-image limit | 400 mm (16 in) is given as the limit when you size or crop the image. It is not a recommended finished size. |
| Our sizing and placement guide | For pocket designs, a 3-inch width for youth sizes, 4 inches for adult sizes XL and below, and 5 inches for adult 2XL and above. |
These figures measure different things (a tool's minimum, an older suggested working size and a source-image limit), so do not read them as one rule. They still give a sense of scale. Brother's smallest face-only size is about 4 inches wide, the same as the pocket width our sizing and placement guide gives for adult sizes XL and below, and its head-and-face minimum (about 5 × 7 inches) is larger than any of those pocket widths. For small areas, line art or a simplified design is the safer route, as our pet line art page puts it: "Line art stays sharp at left chest and cap sizes, where a full photo-style portrait would lose its detail."
Wilcom also warns about changing the size after the stitches are made: "Be careful if, after processing a larger image, you decide to reduce the design size. Stitches may be too closely bunched and cause needle breaks." Our suggestion: if the size has to change, process the photo again at the new size instead of shrinking the finished file.
Why Does More Detail Mean More Stitches?
Because detail is made of stitches. Wilcom's Color PhotoStitch help says "Shorter length will result in greater detail at the cost of a higher stitch count" and "closer spacing will result in greater detail at the cost of a higher stitch count." Brother's manual says a setting closer to Fine "creates more details in the pattern and increases the number of stitches." So detail is paid for in stitches. Our guide to stitch count and why it affects your price explains why the number matters when you order digitizing.
How Do You Check a Photo-Stitch File Before You Stitch It?
Check the file in your software or in a viewer before you load it on a machine. Our free embroidery file viewer shows size, stitch count and color blocks for a file, and our guide to a DST file viewer covers what a preview can and cannot show.
| Check | What to look for | Where it comes from |
|---|---|---|
| Coverage | "No obvious holes in coverage." For Reef PhotoStitch, also "Edges clearly defined" and "No unwanted connectors." | Wilcom's review checklists. |
| Trims | "Number of trims." Wilcom's goal is "the fewest stitches and trims for a good result." | Wilcom's review checklists. |
| Stitch count | "Overall stitch count." Compare it with your quote or estimate. | Wilcom's review checklists. |
| Size and density | If you shrank the design after processing, look for stitches that bunch together. | Wilcom's warning about needle breaks. |
| Thread colors | Compare the on-screen colors with your real threads. | Brother's manual. |
| Fabric and backing | Hatch advises "tightly woven fabrics" such as cotton, linen or denim, says to avoid "stretchy or loose weave materials," and says "Always use a stabilizer, as these designs can be dense." | Hatch's 2024 article. |
| Machine fit | Hatch says to check that the design fits your hoop and that "The machine supports color changes and has sufficient memory for dense stitching." | Hatch's 2024 article. |
| Test stitch | Sew a sample on the fabric you plan to use before a production run. | Our recommendation. A preview is not a stitch-out. |
When Are Line Art or a Simplified Design the Better Choice?
Choose line art or a simplified design when the area is small, when you want one thread color, or when the photo is not ideal. This is our summary of the sources above, not a vendor rule. Wilcom says that for both manual and automatic digitizing, "'clean' images" work best, and Brother's manual says about its outline-based Design Center tool: "The most appropriate images to use are those with few and distinct colors. Images or photos that are intricate or have gradations are not suitable since it is difficult to extract their outlines." That sentence is about a different Brother tool than Photo Stitch, but it shows the same preference for few, distinct colors.
You can simplify a photo yourself before digitizing. Wilcom's Color PhotoStitch help offers Flatten to condense a photo to solid color blocks, and its Reef PhotoStitch tips say "Posterizing effects may produce good results at lower thresholds." For pets, our pet line art page describes tracing your photo into a drawing and digitizing it with run and bean stitches.
| Situation | Leans toward | Why |
|---|---|---|
| Pocket, left chest or cap size | Line art or a simplified design | Our pet line art page says line art stays sharp at left chest and cap sizes, and Brother's smallest face-only Photo Stitch 1 size is about 4 inches wide. |
| Large area, sharp well-lit photo, a textured look is fine | A photo-stitch tool | Wilcom and Hatch say their photo tools work best with crisp, high-contrast photos. |
| Only one thread color wanted | Line art, Photo Flash, Reef PhotoStitch or Brother's Mono option | These produce single-color stitching. |
| Dark, blurry or crowded photo | A better photo first | Brother and Hatch list these photos as poor inputs, and our pet line art page says blurry, dark or far-away photos lose detail even in line art. |
| A logo or mascot that happens to start as a photo | Simplified artwork digitized by hand | Wilcom says clean images with solid colors and defined outlines work best. See our logo digitizing guide. |
What Should You Send If You Want a Photo Digitized for You?
Our service pages say you can send files such as "PNG, JPG, PDF, AI, EPS, SVG, PSD and CDR," "up to 50 MB each," with "up to 5 files per design." They also say "a photo or sketch is fine to start from," and the order form lets you "add instructions if you have them." Use those instructions well. A short checklist:
- The original photo, as large and sharp as you have it, plus other photos of the same subject if you have them. Our pet line art page says to send more than one photo if markings matter.
- The finished size and where the design goes, such as a pocket, cap front or bag. The pet line art page asks for "The finished size, or a placement such as Left chest or Cap front."
- The garment or fabric.
- What you expect: a one-color line drawing, a simplified design in a few colors, or a multi-color photo-style stitch. Say which, and ask which approach suits your photo, so nobody has to guess.
- Any text to add, the thread brand if you have one in mind, and your machine or the file format you need, such as PES, DST or JEF.
If you already have a stitch file and only need another format, use our free embroidery format converter. Our FAQ explains that the converter "only changes the format of files that are already digitized," and that "Turning a logo, picture or sketch into stitches is a job for our digitizers."
What Mistakes Make Photo Embroidery Look Wrong?
- Starting with a small, dark or blurry photo. Brother's manual lists small-subject and dark photos as not appropriate, and Hatch says to avoid low-light and blurry images.
- Keeping a busy background. Hatch says to avoid busy backgrounds. Crop or remove them first.
- Asking for too many thread colors. Wilcom says more colors reach "a point of diminishing returns," and every thread change counts.
- Shrinking the design after processing. Wilcom warns that stitches "may be too closely bunched and cause needle breaks."
- Trusting the colors on screen. Brother says a mismatch between screen and thread colors will greatly affect the result. Pick real threads.
- Skipping the test stitch. Hatch says photo designs "can be dense." Sew a sample on your fabric with the stabilizer you plan to use.
- Expecting a print. Wilcom says embroidery digitizing works least effectively with photographs. Expect a stitched interpretation, not a photograph.
Frequently Asked Questions
Can any photo be turned into an embroidery design?
Not equally well. Wilcom says results "depend greatly on the resolution, color depth, and quality of source images," and Brother's manual lists small-subject and dark photos as not appropriate. A sharp, well-lit photo with one clear subject has the best chance. For anything else, a different photo, line art or a simplified design usually works better.
What is photo stitch?
Photo stitching means turning a photograph into a stitch design with software. Vendors use different feature names and methods. Wilcom has Photo Flash, which resembles "the output of a line printer," Reef PhotoStitch, which is "reminiscent of a coral reef," and Color PhotoStitch, which uses "multiple thread colors." Hatch lists Color PhotoStitch, Reef PhotoStitch and PhotoFlash, and Brother's PE-DESIGN 11 has Photo Stitch 1 and Photo Stitch 2.
What is the difference between Photo Flash, Reef PhotoStitch and Color PhotoStitch?
In Wilcom's help, Photo Flash and Reef PhotoStitch produce single-color stitching and Color PhotoStitch uses multiple thread colors. Photo Flash makes rows of stitches with varying spacing. Reef PhotoStitch makes open stitching with "a low stitch count based on the color contrast present in the image."
How many thread colors should a photo embroidery design use?
It depends on the tool. For its Color PhotoStitch, Wilcom suggests about 5-6 shades for a grayscale photo, 7-10 colors for a simple color photo and 14-16 for a complicated one, and no more than 20. Single-color methods such as Photo Flash and Reef PhotoStitch use one thread color. Hatch's 2018 article says 7 to 10 colors usually give the best results. See the color table above for the exact wording.
Can I stitch a portrait or a face?
Vendors say yes, with conditions. Hatch's article says "Faces and portraits are ideal, especially with good lighting and contrast," and Brother's Photo Stitch 1 tutorial lists minimum sizes of about 4 × 4 inches for a face only and about 5 × 7 inches for head and face. At smaller sizes a one-color line drawing is the safer route.
How big does a photo embroidery design need to be?
It depends on the tool. As one example, Brother's PE-DESIGN 11 Photo Stitch 1 tutorial lists minimum sizes of about 4 × 4 inches for a face only and about 5 × 7 inches for head and face. Wilcom's older help and Hatch's 2018 article give 150 × 150 mm as a suggested working size, and Wilcom's current help gives 400 mm (16 in) as a source-image limit, not a finished size. For a small area such as left chest or a cap, our pet line art page says line art stays sharp where a full photo-style portrait would lose its detail.
Can I turn a photo into an embroidery file for free?
Not with a format converter. Our FAQ says our converter "only changes the format of files that are already digitized." The photo tools in this guide are features of embroidery programs from Wilcom, Hatch and Brother, and we did not look at free options for this guide. Check each vendor's page for the version, level and trial terms. Hatch says its PhotoStitch tools are exclusive to its Digitizer level. For what free software can and cannot do in general, see our guide to free embroidery digitizing software.
Will the stitched photo look like the original?
Not exactly. The vendors describe their results as lines, stippling or overlapping stitching, and Wilcom's stated goal is "to employ the fewest colors/threads to obtain the fewest stitches and trims for a good result," so expect a simplified picture. Check the preview and sew a test.
What fabric works for a photo-stitch design?
Hatch's article suggests "tightly woven fabrics" such as cotton, linen or denim, and says to avoid stretchy or loose weave materials and to always use a stabilizer. These are one vendor's recommendations, so test on your own fabric.
Is line art better than a photo stitch?
It depends on the size and the look you want. Line art keeps the main outlines in one thread color, which is why our pet line art page says it stays sharp at left chest and cap sizes. Photo-stitch methods can show tone and texture, but they need more room (see the size table) and careful thread choice. The comparison table in this guide shows when each leans one way.
What file should I send to a digitizer?
Send the sharpest original you have. Our pages list PNG, JPG, PDF, AI, EPS, SVG, PSD and CDR files up to 50 MB each, and say you can add instructions to the order. Include the finished size, garment and format.
Final Thoughts
A photo can become embroidery, but it becomes a simplified version of itself. The documentation reviewed points to several important factors: a sharp, high-contrast photo with a clear subject, enough space for the detail, and an appropriate number of thread colors. Before production, check the design's coverage, trims and stitch count, compare the thread colors with your actual threads, and sew a test sample.
When the area is small or the photo is imperfect, line art or a simplified design is usually the safer route. Our guides to converting an image to an embroidery file and line art digitizing for pet pictures take the next steps from here.
Sources and Further Reading
Facts about photo digitizing come from the pages below, which we opened on November 21, 2026. This guide is a documentation-based explainer, not a test of any program. Features, product levels and numbers can change, so check each page before you rely on it. Wilcom, Hatch, Brother, Stitch Era, Corel and EduTech Wiki are names of their respective owners. EmbroideryDigitize is not affiliated with them, and the names appear only to show where each fact comes from.
- Wilcom EmbroideryStudio help: Auto-Digitizing with Photos, Preparing photos for auto-digitizing, Auto-digitizing with Photo Flash, Auto-digitizing with Reef PhotoStitch, Reef PhotoStitch: Review the results, Auto-digitize with Color PhotoStitch, Adjust image settings, Adjust color settings, Adjust stitch settings, Color PhotoStitch: Review the results and Choosing suitable artwork, plus the older e4 page Prepare photos for auto-digitizing.
- Hatch Embroidery: Create Memorable Embroidered gifts with PhotoStitch and PhotoFlash (October 2018), Color PhotoStitch - Cherished Memories to Embroidered Art (September 2024) and the features FAQ.
- Brother: the PE-DESIGN 11 instruction manual (PDF), Tutorial 6-3 and 6-4, the Photo Stitch features pages and the Design Center overview.
- Stitch Era - photo-stitching (EduTech Wiki, marked incomplete).
- Related on embroiderydigitize.com: our embroidery digitizing page, pet line art page, FAQ, file viewer and format converter, and the guides to sizing and placement, stitch count and embroidery digitizing services.
Need a Logo or Image Digitized?
Turn your logo, artwork, or custom design into a production-ready embroidery file.
Create your free EmbroideryDigitize account and submit your artwork, required size, garment type, and preferred embroidery format, such as PES or DST.
Existing customer? Login here.
If you already have an embroidery file but need another machine format, use our Free Embroidery Format Converter to convert supported embroidery files online.